
Quick answer
To add a product image in WooCommerce, edit the product and click Set product image in the Product image box on the right. Choose a photo from the Media Library or upload a new one, click Set product image, then click Update. To change it later, pick a new photo in the same box.
Add extra photos in the Product gallery box below it. For a variable product, set a different image on each variation so the photo changes when the customer picks a colour or size.
This is part of the Build a WooCommerce Store hub, which walks through setting up your shop, adding products and taking payments. Before you upload anything, make sure you know how to add products in WooCommerce and how to add variable products in WooCommerce, and if you have a spreadsheet full of products, see how to import products in WooCommerce with CSV.
Tested on: WordPress 7.1.4 · WooCommerce 11.3.0 · Theme: GeneratePress 3.6.1 · PHP 8.4.27 · Tested: 15 November 2026 on a WordPress test install. Screenshots are from that test install. If your dashboard looks different, check your WooCommerce version first — screens change between versions.
What is a product image, a gallery image, and a variation image?
Three boxes, three different jobs. Mixing them up is the most common image mistake in WooCommerce, so get this clear first.
Product image (the main image). The one photo that represents the product. It shows in the shop, in search results, on the product page as the big image, in the cart and at checkout. One per product. If you upload only one photo, this is the one.
Product gallery images. Extra photos under the main image on the product page. The customer clicks a thumbnail to see the other angles — the back of the cake, the perfume box open, the T-shirt laid flat. They do not show in the shop grid.
Variation images. A different photo for each variation of a variable product — blue T-shirt, black T-shirt. When the customer picks a colour, the main image changes to that variation’s photo. If you do not set one, the main product image stays up no matter which variation is chosen.
A fourth kind of image people forget is the category image. Categories can have a thumbnail too, and it shows on the shop page next to the category name. It is set under Products → Categories, not on the product.
What you need before you start
- A product, already created. If you have not added one yet, start with how to add products in WooCommerce, then come back here.
- Photos, prepared before you upload them. A product with one good photo sells better than a product with six bad ones. Use the best photo you have as the main image, and the rest as gallery images.
- The right size and format, decided in advance. For the main image, use at least 800 × 800 pixels. For a full-width product page, 1200 × 1200 pixels is better. Save as JPG for a photo, PNG only when you need a transparent background. Keep each file under 300 KB if you can — the image section below explains how.
- Filenames that mean something. vanilla-cake-18cm.jpg is useful. IMG_20261113_0942.jpg is not. A clear filename helps you find the photo again, helps your SEO a little, and makes the Media Library usable six months from now.
- Alt text, ready to write. One short sentence describing the photo, for example “Vanilla sponge cake with white buttercream, 18 cm, on a white cake stand”. You will enter it when you upload. Do not leave it blank, and do not stuff it with keywords.
You do not need a plugin for any of this. Adding a product image, a gallery, and a variation image all work in WooCommerce core, free, as it ships.
How to add a product image in WooCommerce, step by step
Step 1: Open the product
Go to Products → All Products and click the product. Or use Products → Add New if you are creating the product now — the image boxes are in the same place either way.
Step 2: Set the product image
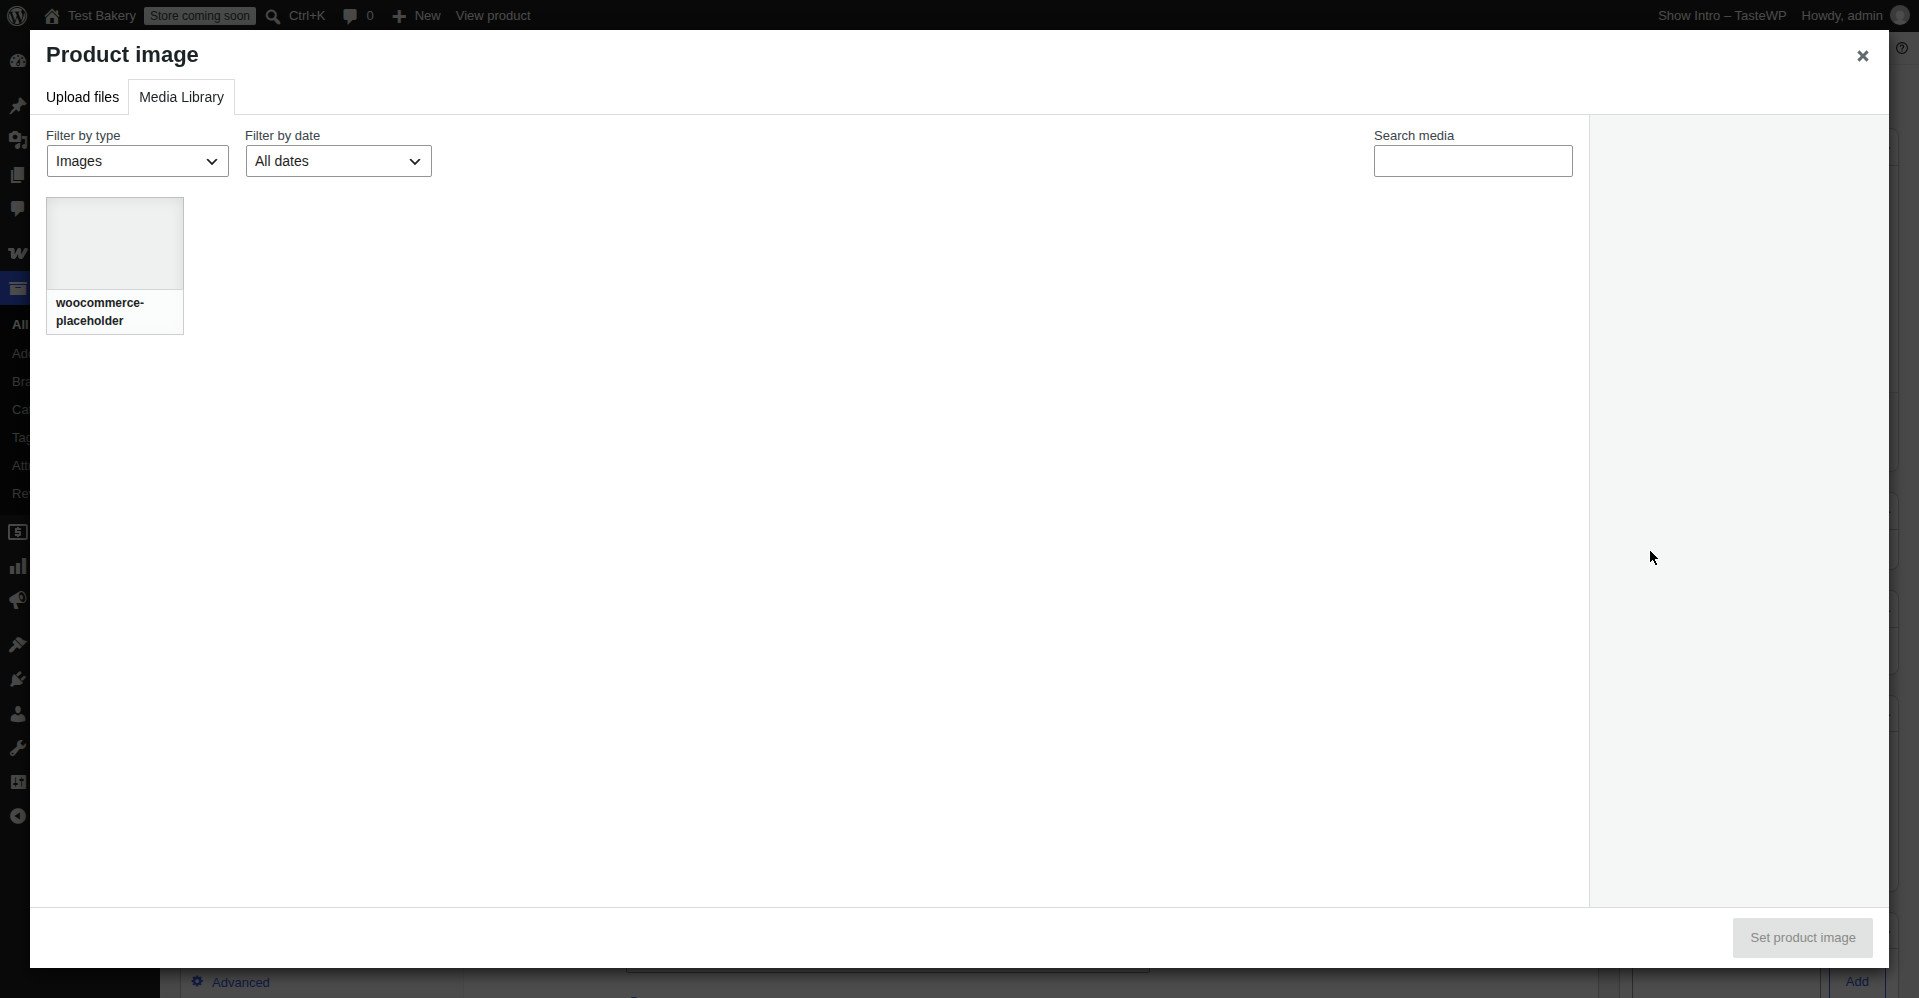
Look at the right-hand column. Find the Product image box and click Set product image. The Media Library opens. Click Upload files and choose a photo from your computer, or click a photo you have already uploaded. Then click Set product image at the bottom right.
Step 3: Fill in the Alt text and the title
While the photo is selected in the Media Library, fill in the fields on the right: Alt Text — one short sentence describing what is in the photo — and Title, which is usually the product name. Then click Set product image.
Alt text is not optional decoration. It is what a screen reader reads to a blind customer, and it is what Google shows when the image cannot load. Write it for a person, not for a search engine: “Blue cotton T-shirt, front view” is good. “T-shirt buy cheap T-shirt South Africa best T-shirt” is not.
Step 4: Click Update
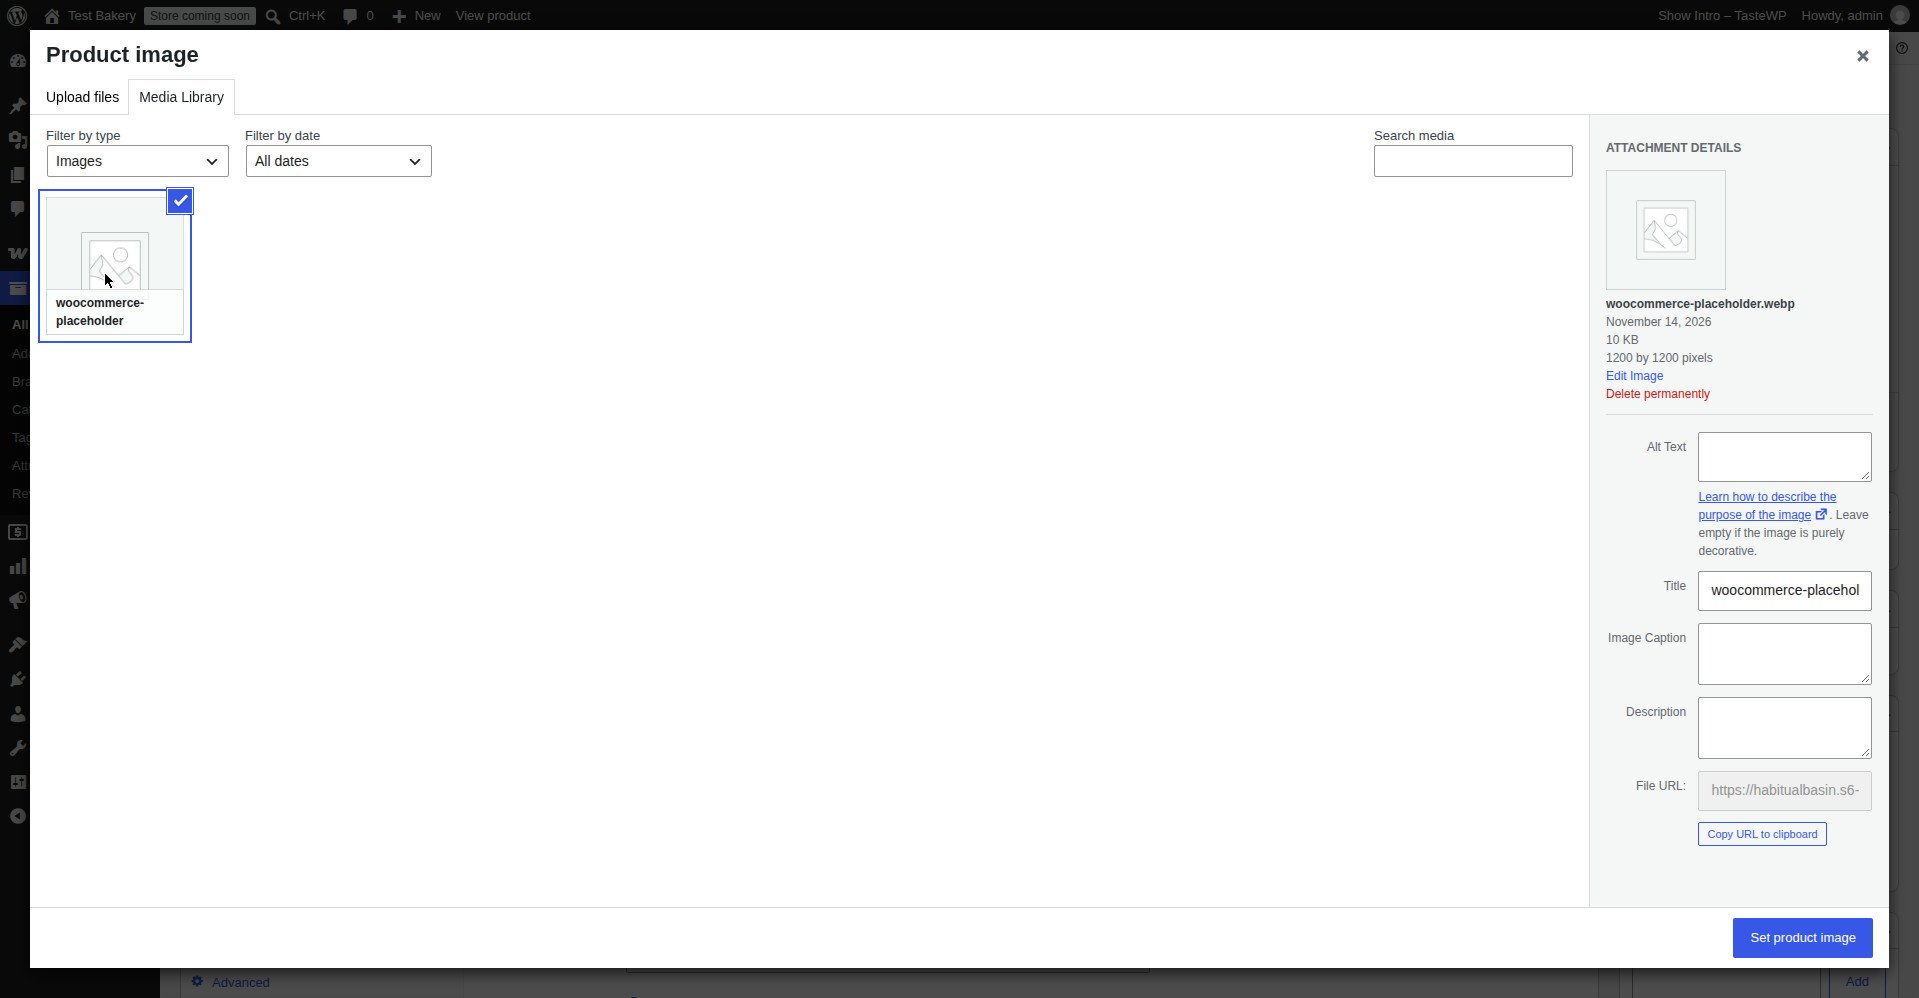
Click the blue Update button at the top right. WooCommerce does not save image changes automatically. If you close the tab without clicking Update, the image is gone.
Check the front end in a private window: open the shop page and the product page. The photo should be there, the right way up, and not blurry.
How to add product gallery images in WooCommerce
Gallery images are the extra angles. The customer sees the main image first, then clicks the thumbnails underneath it to see the rest.
Step 1: Find the Product gallery box
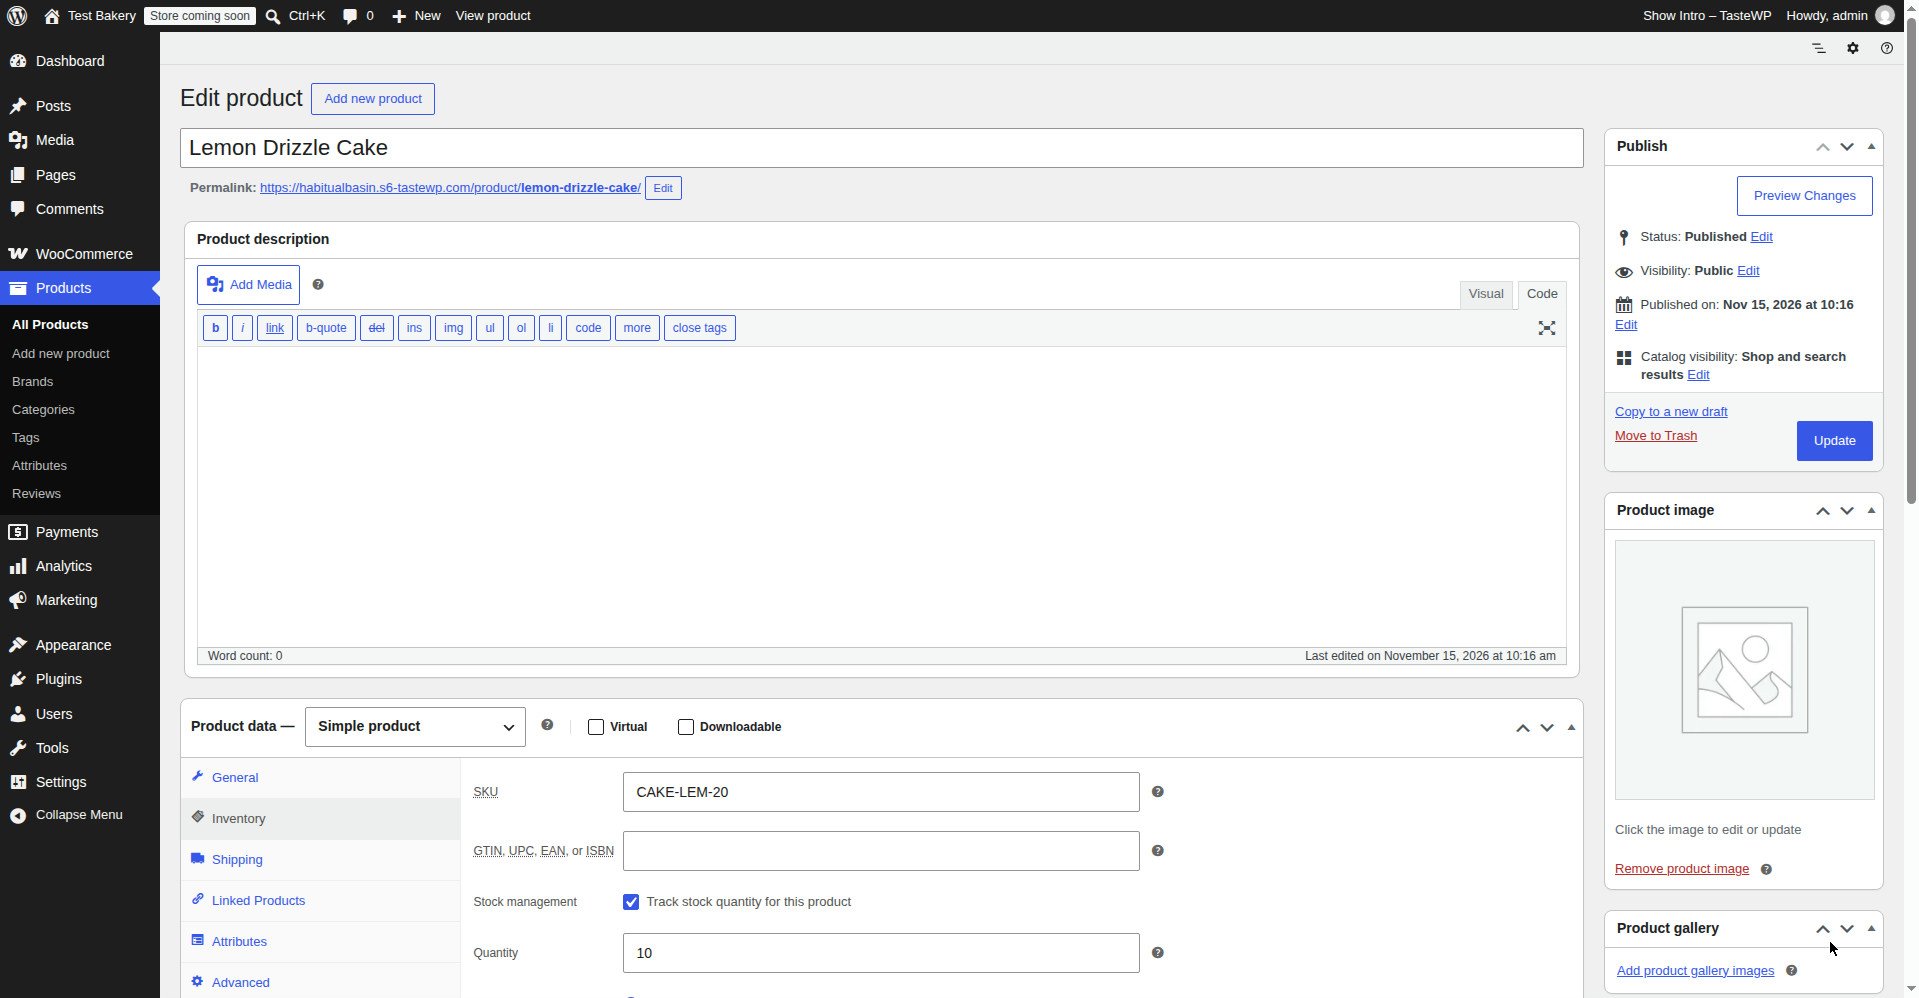
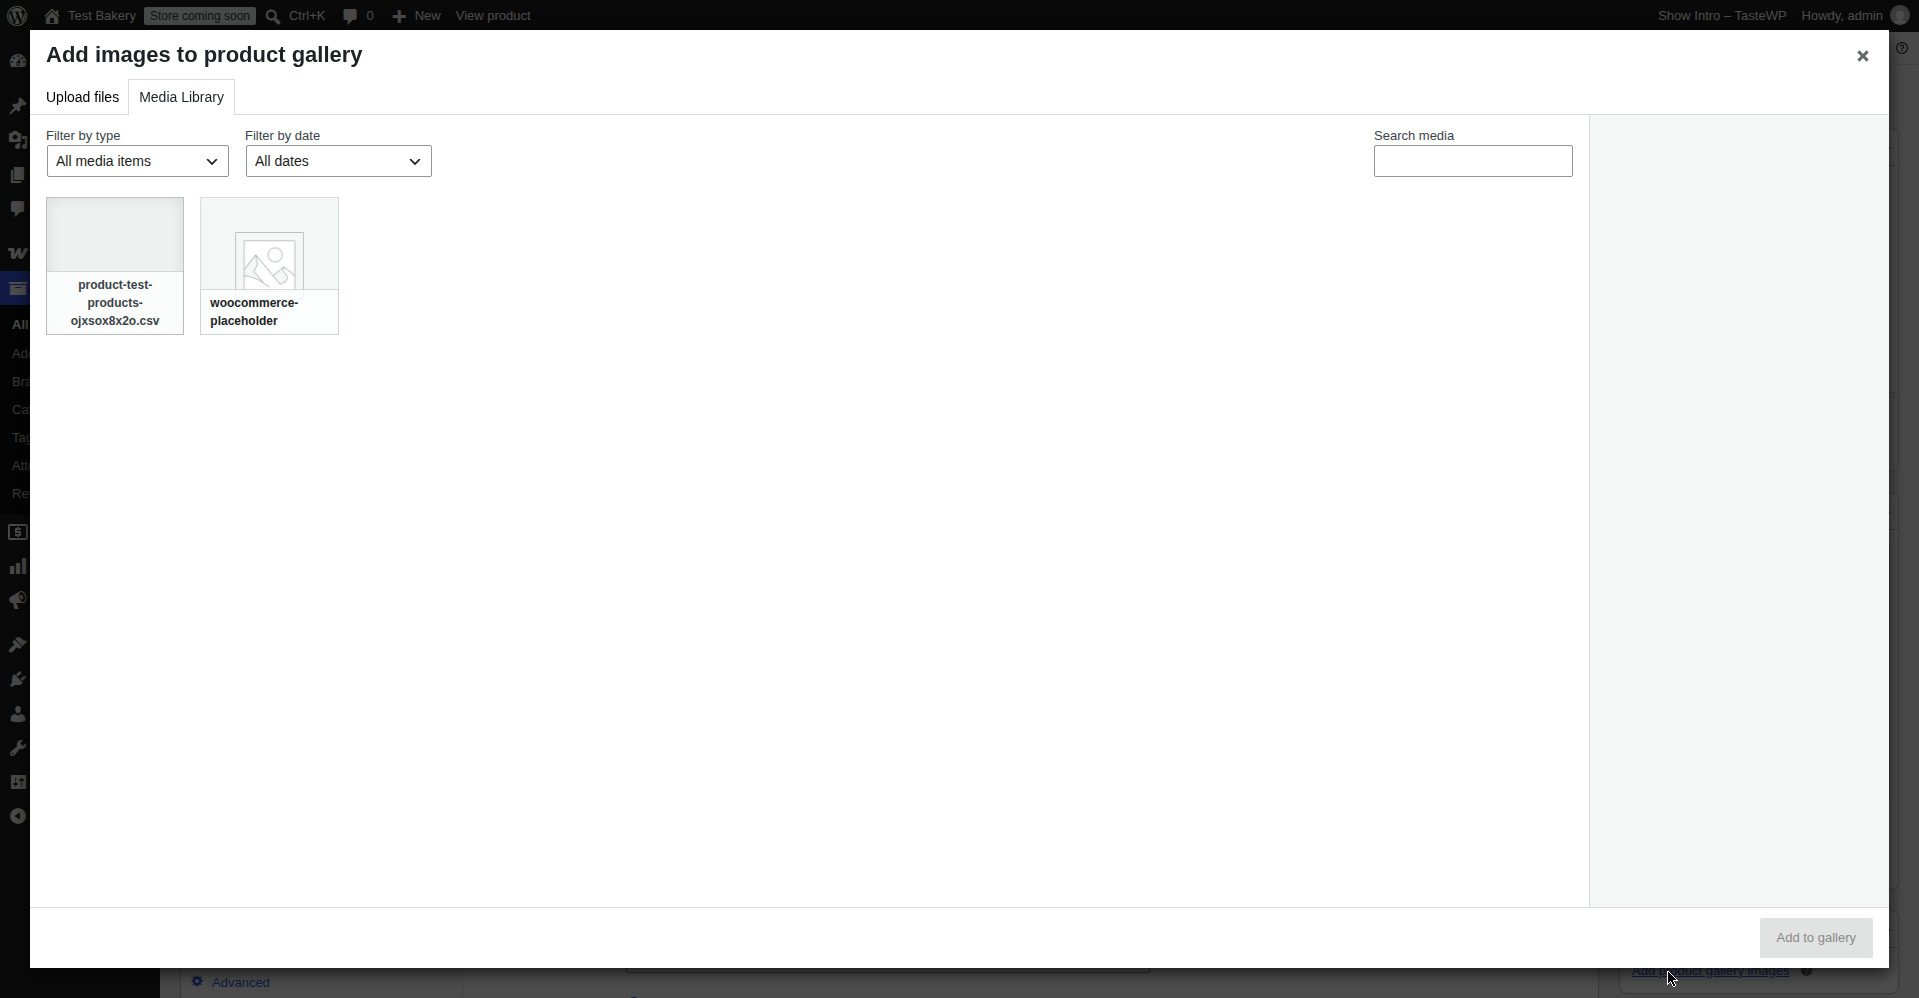
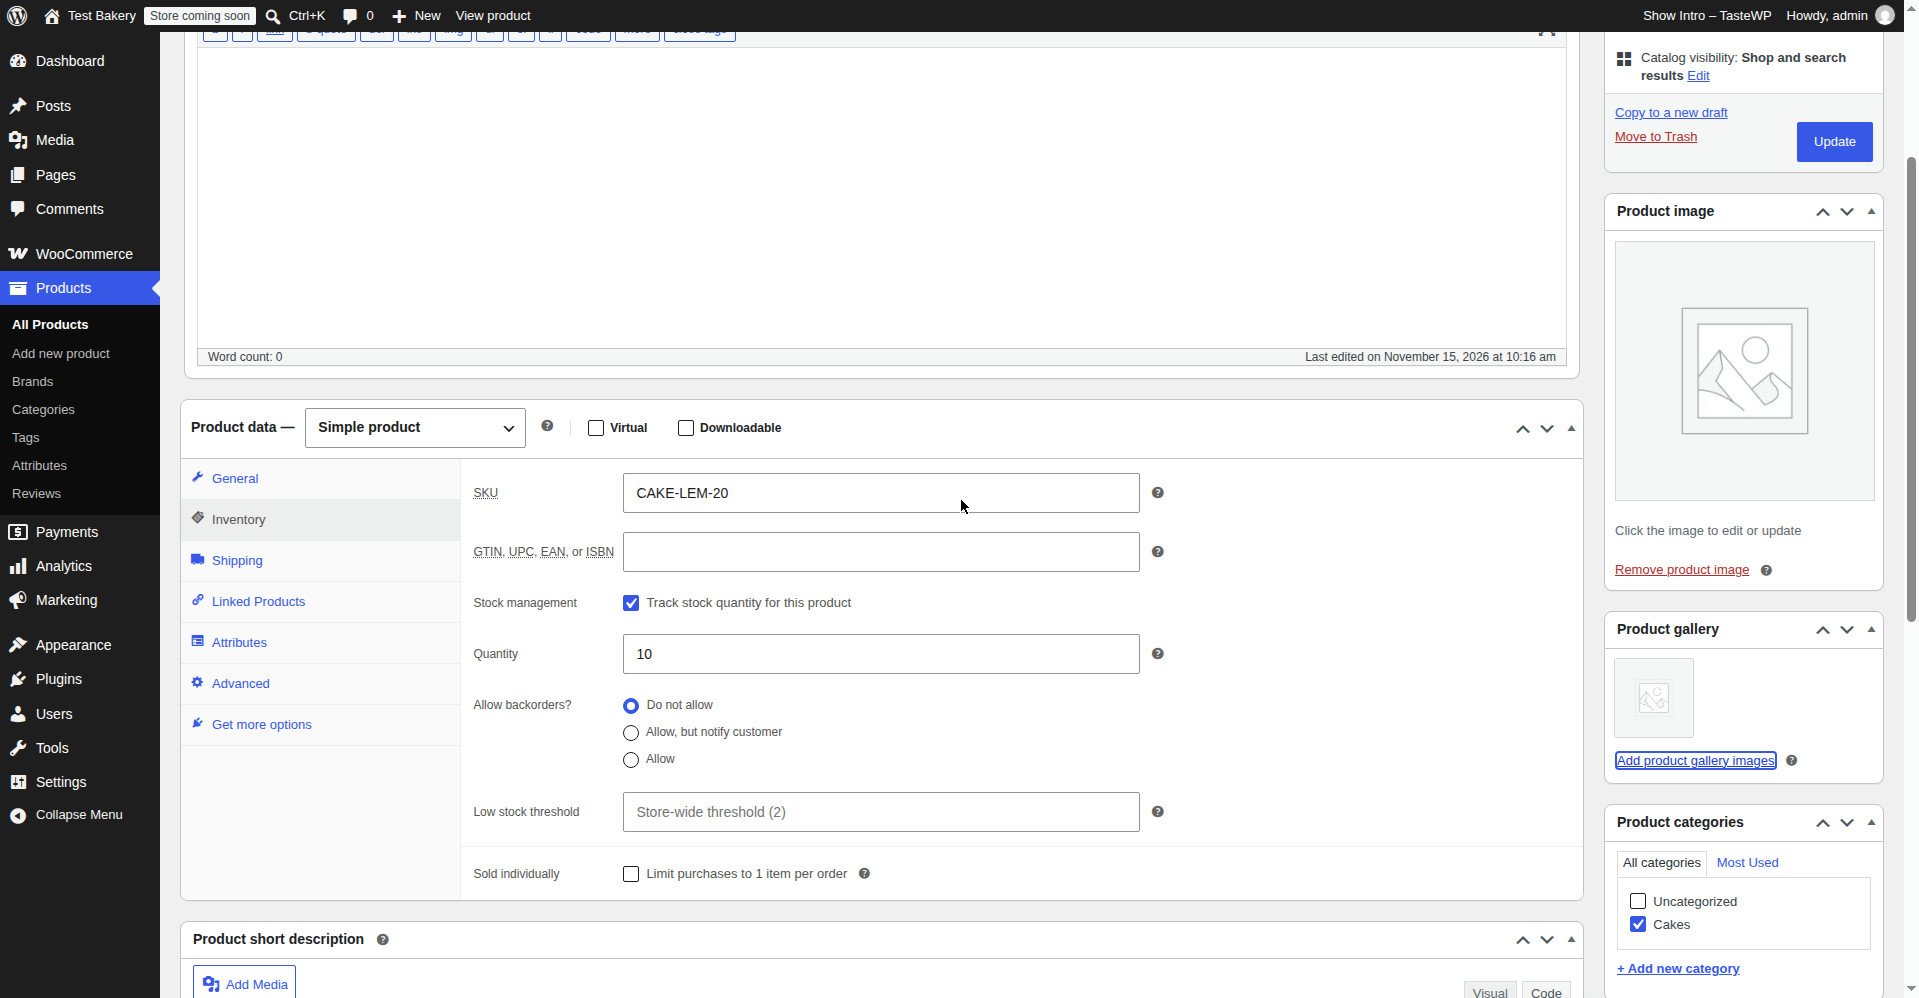
On the product edit screen, look at the right-hand column, below the Product image box. The Product gallery box is there. Click Add product gallery images.
Step 2: Select the photos, in order
In the Media Library, click the photos you want in the gallery, in the order you want them to appear. The first one you click appears first. Hold Ctrl (or Cmd on a Mac) to select more than one at a time, or click Upload files to add new ones. Then click Add to gallery at the bottom right.
Step 3: Reorder or remove
To change the order, drag a thumbnail left or right in the gallery box. To remove one, hover over it and click the small ×.
Step 4: Click Update, then check it on the front end
Click Update, then open the product page in a private window. Click each thumbnail and check that the big image changes, that every photo is the right way up, and that none of them is blurry. If a thumbnail shows a photo you did not expect, you probably added the wrong file — remove it from the gallery and add the right one.
How many gallery images should you add? Three to five is enough for most products: front, back, detail, size or scale, and packaging. Ten photos of the same cake from almost the same angle do not help anyone, and they slow the page down. If the product genuinely has many details — a gift hamper, for example — six or seven is fine. Stop when the next photo would not tell the customer anything new.
How to set a different image for each variation
For a variable product — a T-shirt in Blue and Black, a perfume in 30 ml and 50 ml — the customer should see the photo change when they pick an option. That only happens if you set an image on each variation.
Step 1: Open the Variations tab
Edit the variable product and click the Variations tab in the Product data box. If you have not created the variations yet, do that first — the full process is in how to add variable products in WooCommerce.
Step 2: Expand one variation and set its image
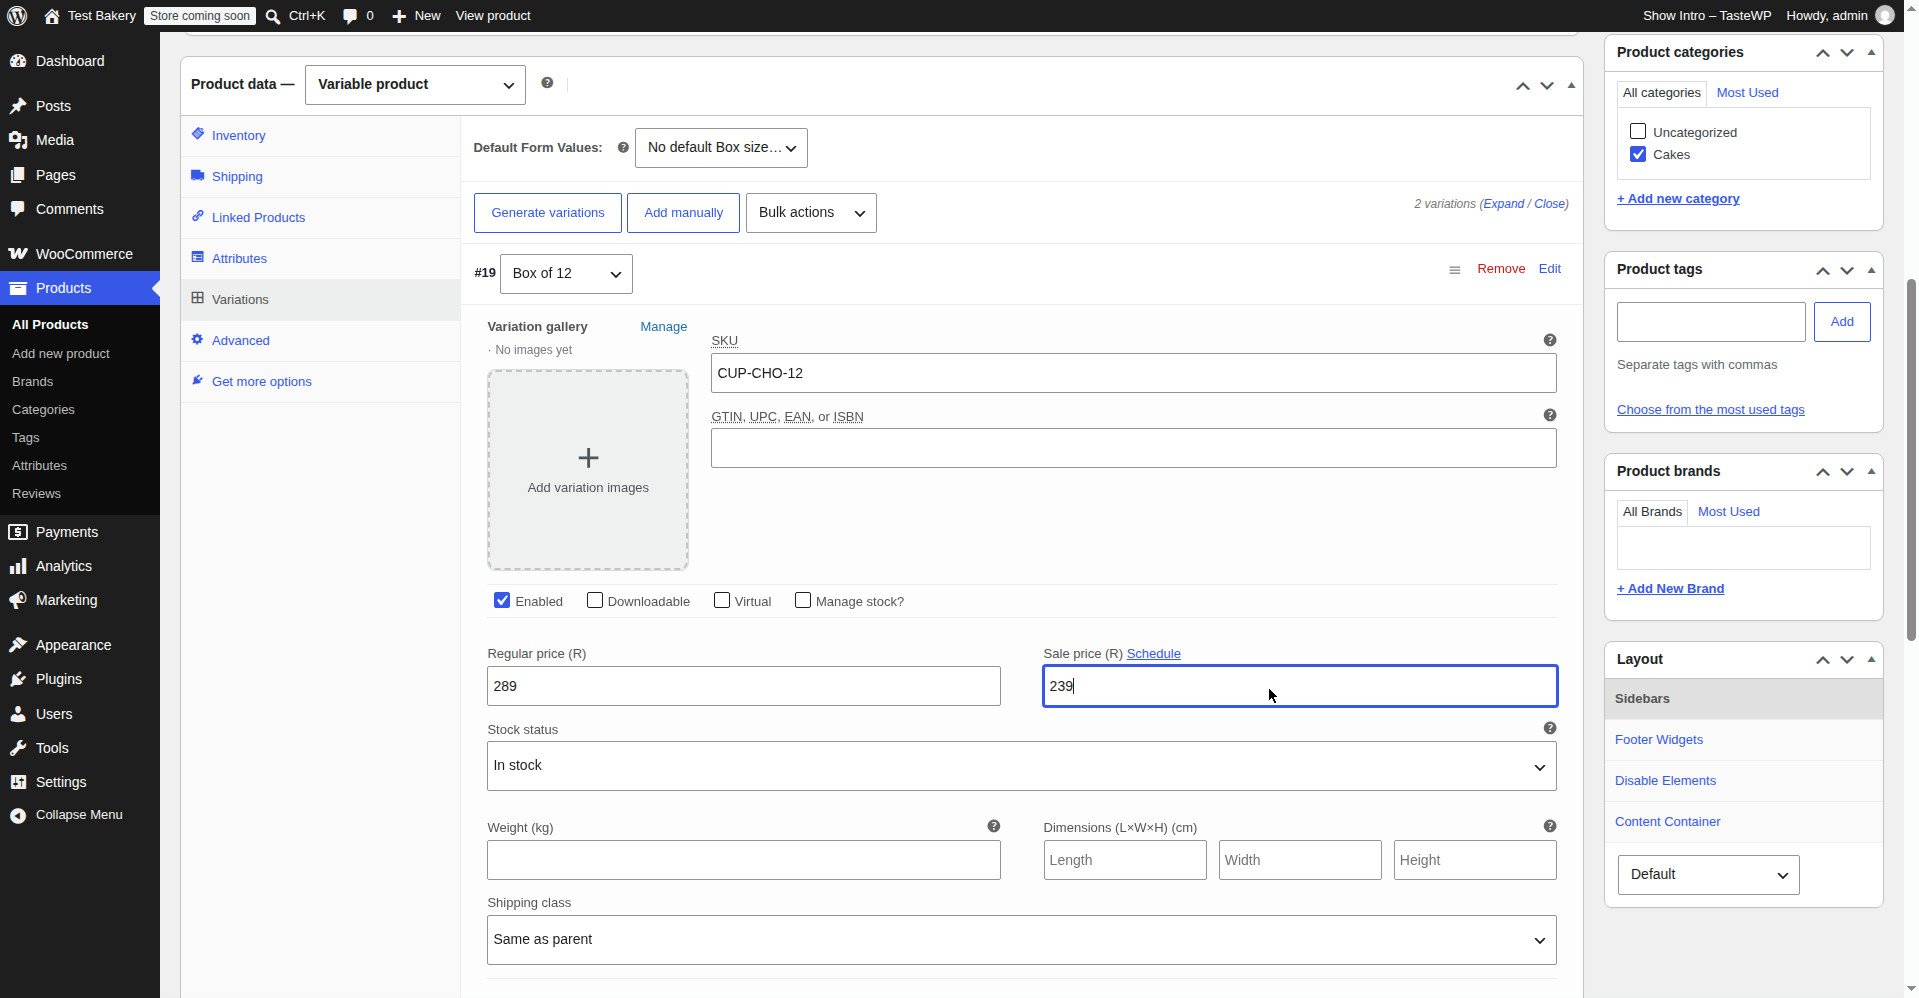
Expand a variation. Look for the Image field. Click it, choose the photo for that variation, and click Set variation image. Do the same for every variation that looks different.
Step 3: Save changes and test it
Click Save changes at the bottom of the Variations tab, then Update at the top right. Open the product page in a private window, pick a colour from the dropdown, and check that the main image changes to that variation’s photo. Pick the other colour and check again.
If the image does not change, check two things: the variation has an image set (not just the product), and the variation is Enabled with a price — a variation with no price is hidden, and its image goes with it.
How to change or remove a product image
- To change the main image: click the thumbnail in the Product image box, then click Remove product image, then click Set product image again and choose the new photo. Do not upload a second photo and hope WooCommerce knows which one you mean — remove the old one first.
- To change a gallery image: click the thumbnail in the gallery box to open it in the Media Library, and replace it there, or remove it from the gallery and add a new one.
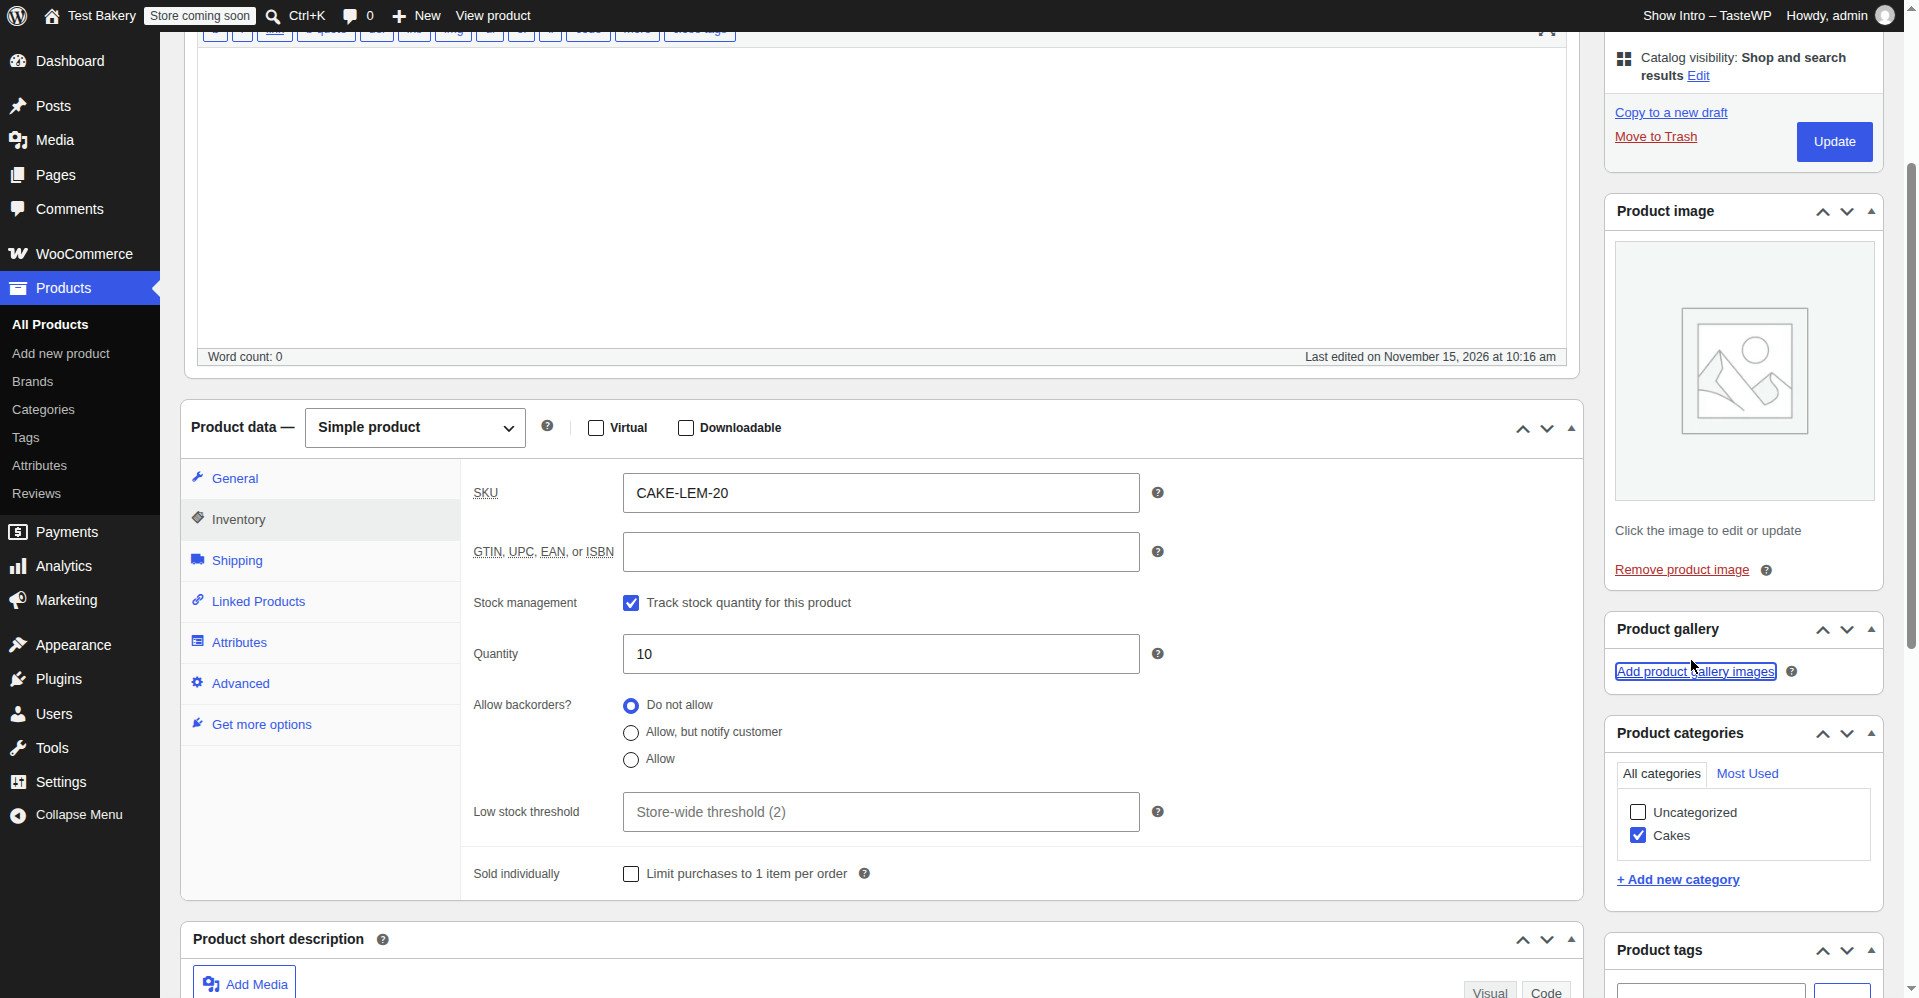
- To remove a gallery image: hover over the thumbnail in the gallery box and click the small ×. That removes it from the gallery. It does not delete the file from the Media Library.
- To delete a file properly: go to Media → Library, find the file, and delete it. Only do this if no product is using it — deleting a file that a product uses leaves a broken image on that product page. Check the product first.
WooCommerce image sizes — and why your images look blurry or cropped
WooCommerce creates several copies of every image you upload, at different sizes, and shows the right one in the right place. That is why a photo can look perfect in the Media Library and blurry on the shop page: the shop is showing a smaller copy.
The three sizes that matter
| Size | Where it is used | Default size |
|---|---|---|
| Thumbnail | Shop grid, cart, related products | 300 × 300 pixels |
| Single product image | The big image on the product page | 600 × 600 pixels |
| Catalog / shop image | The product image on the shop page | 300 × 300 pixels |
You can change these at Appearance → Customize → WooCommerce → Product Images. The two settings there are Main image width and Thumbnail width. WooCommerce’s own documentation says the main image width should match the width of your theme’s content area — for GeneratePress, that is usually 600 to 800 pixels — and that changing a size does not fix images you have already uploaded.
Why an image looks blurry
The most common cause is uploading a photo smaller than the size WooCommerce needs to show. A 300 × 300 photo stretched to fill a 600 × 600 space will look soft, and no setting fixes that. Upload the main image at 1200 × 1200 pixels, and WooCommerce can make a sharp copy at every size it needs.
The second most common cause is changing the image size settings after the photos were uploaded. The old copies are still the old size. To rebuild them, go to Tools → Regenerate Thumbnails — or, if that tool is not installed, install the free Regenerate Thumbnails plugin, run it, and delete it again afterwards. It rebuilds every image at the new sizes. Run it once, on a quiet day, not in the middle of adding products.
Why an image is cropped the wrong way
WooCommerce crops thumbnails to a square by default. A tall photo of a cake will lose the top and the bottom. To stop that, go to Appearance → Customize → WooCommerce → Product Images and set Thumbnail cropping to Uncropped. Square product photos — 1200 × 1200 — are the simplest fix: they crop cleanly at every size, and they line up neatly in the shop grid.
How to change the image sizes
- Go to Appearance → Customize → WooCommerce → Product Images.
- Set Main image width to 600, or 800 if your theme’s content area is wide.
- Set Thumbnail width to 300.
- Set Thumbnail cropping to Uncropped if your photos are not square, or leave it at 1:1 if they are.
- Click Publish.
- If you changed the sizes after uploading photos, run Regenerate Thumbnails once, then check the shop page.
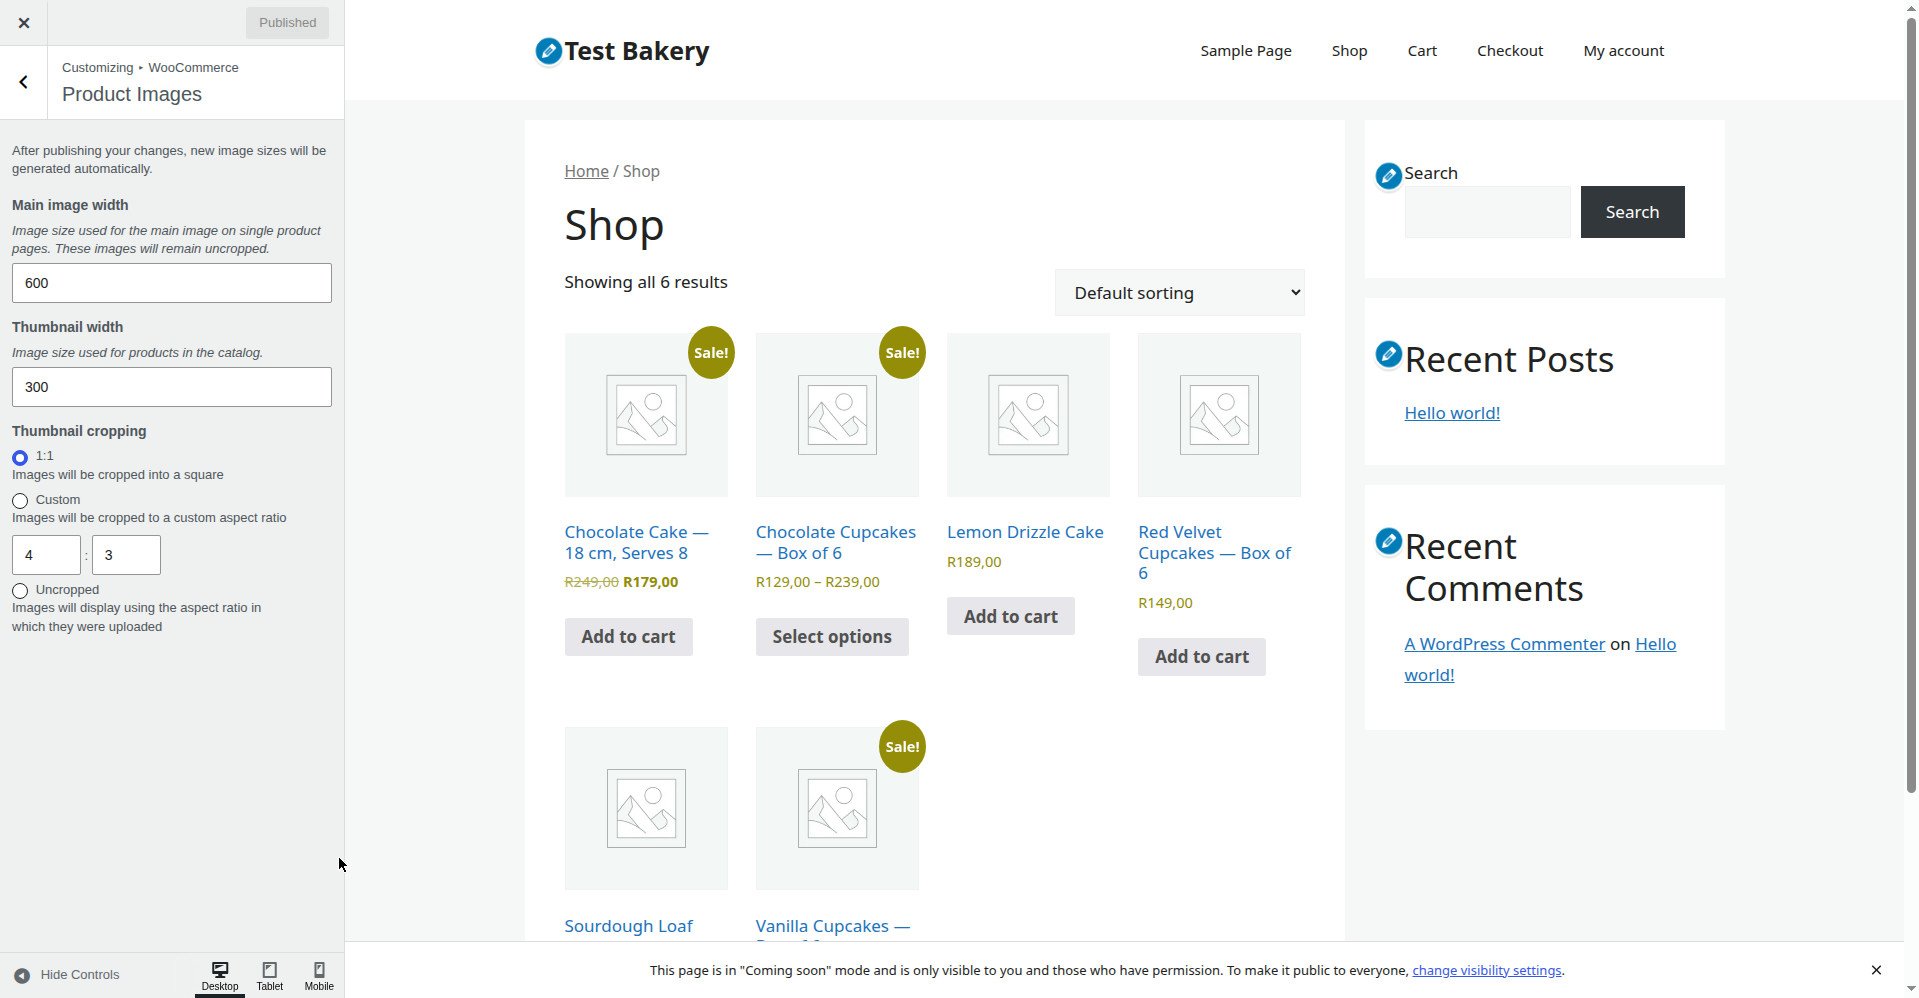
Image file size and page speed — the part that costs you sales
A product page with six uncompressed photos, each 2 MB, is a 12 MB page. On a South African mobile connection, that page takes a long time to load, and a customer who is waiting is a customer who leaves. Google also uses page speed as a ranking factor, so slow images cost you traffic as well as sales.
Before you upload
- Resize the photo. A phone photo is often 4000 pixels wide. Resize it to 1200 × 1200 before you upload it. You do not need 4000 pixels on a website.
- Compress it. Use a free tool such as TinyPNG or Squoosh, or a plugin such as Smush (free version), to shrink the file without a visible loss of quality. A 1200 × 1200 JPG should be under 300 KB. If it is over 500 KB, compress it again.
- Use JPG for photos, PNG only for graphics with transparency. A PNG photo is usually three to five times larger than the same photo as a JPG, for no visible benefit.
After you upload
- Do not upload the same photo twice. If you need the same photo on two products, select it from the Media Library instead of uploading it again. Duplicates waste disk space and make the Media Library unusable.
- Check the page speed. After you publish a product with images, open the product page on your phone, on mobile data, not Wi-Fi. If it takes more than three seconds to load, the images are too big.
- Use lazy loading. WordPress loads images as the customer scrolls to them by default, since WordPress 5.5. Do not turn that off. It means the six gallery images do not all load at once.
A note on image file sizes in WooCommerce
WooCommerce does not compress your images for you. It makes smaller copies, but the original file stays the size you uploaded. A 5 MB original means a 5 MB file sitting on your server, even if the shop shows a 300-pixel copy. Compress before you upload, every time.
What I tested / What failed
I tested this on a clean WordPress test install, not on a live shop, so a mistake would not cost a real customer a sale. Two things went wrong, and both are worth knowing about before you do this on your own store.
Failure 1: The gallery thumbnails showed, but clicking them did nothing
I added three gallery images to a test product, saved, and opened the product page. The thumbnails were there under the main image, but clicking one did not change the big image. It stayed on the main photo.
The cause was not the gallery. It was the theme’s image settings. The test install was using a theme that had not been set up for WooCommerce galleries — the gallery JavaScript was not loading. The fix was to check the product page with the default Storefront theme, where the gallery worked, and then check the GeneratePress settings. The lesson: if the gallery does not work, test with a default theme before you blame WooCommerce. A theme that does not support WooCommerce galleries will show the thumbnails and do nothing with them.
Failure 2: A variation image did not change when I picked a colour
On a variable test product, I set a blue image on the Blue variation and a black image on the Black variation. On the product page, picking Black did nothing — the main image stayed blue.
The cause was the variation itself. The Black variation had no regular price, so WooCommerce hid it from the front end, and the image went with it. The dropdown still showed Black, but selecting it did nothing, because the variation was not purchasable. Once I added the regular price and saved, the image changed correctly. The lesson: a variation image is only as good as the variation itself. Price, Enabled, and stock status all have to be right, or the image will not show.
What worked
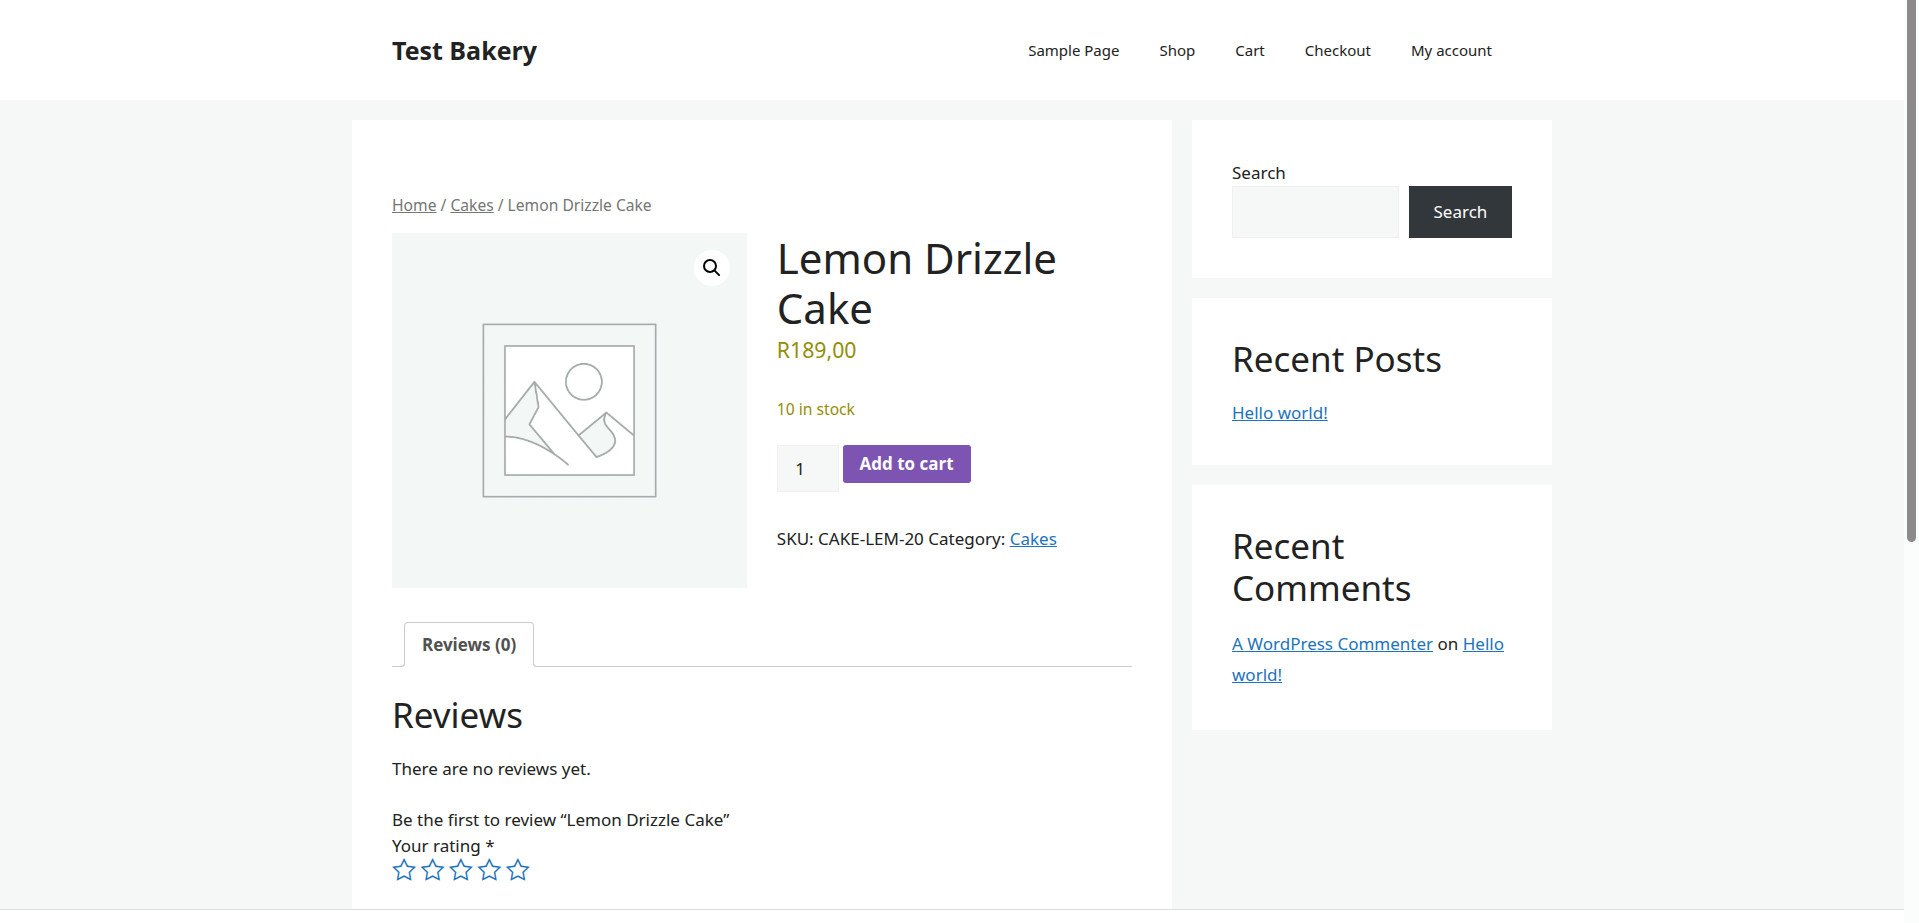
The simple-product flow worked exactly as described: the featured image was set to the WooCommerce placeholder (woocommerce-placeholder.webp, 10 KB, 1200×1200). One gallery image was added — the same placeholder — and then removed via the × (“Delete image”) instantly with no confirmation; the gallery was then empty while the featured image stayed. Image sizes were left at defaults: Main image width 600, Thumbnail width 300, Thumbnail cropping 1:1. On the front end, the placeholder shows as the main image, with R189,00, “10 in stock”, SKU CAKE-LEM-20, Category Cakes, and no gallery thumbnails.
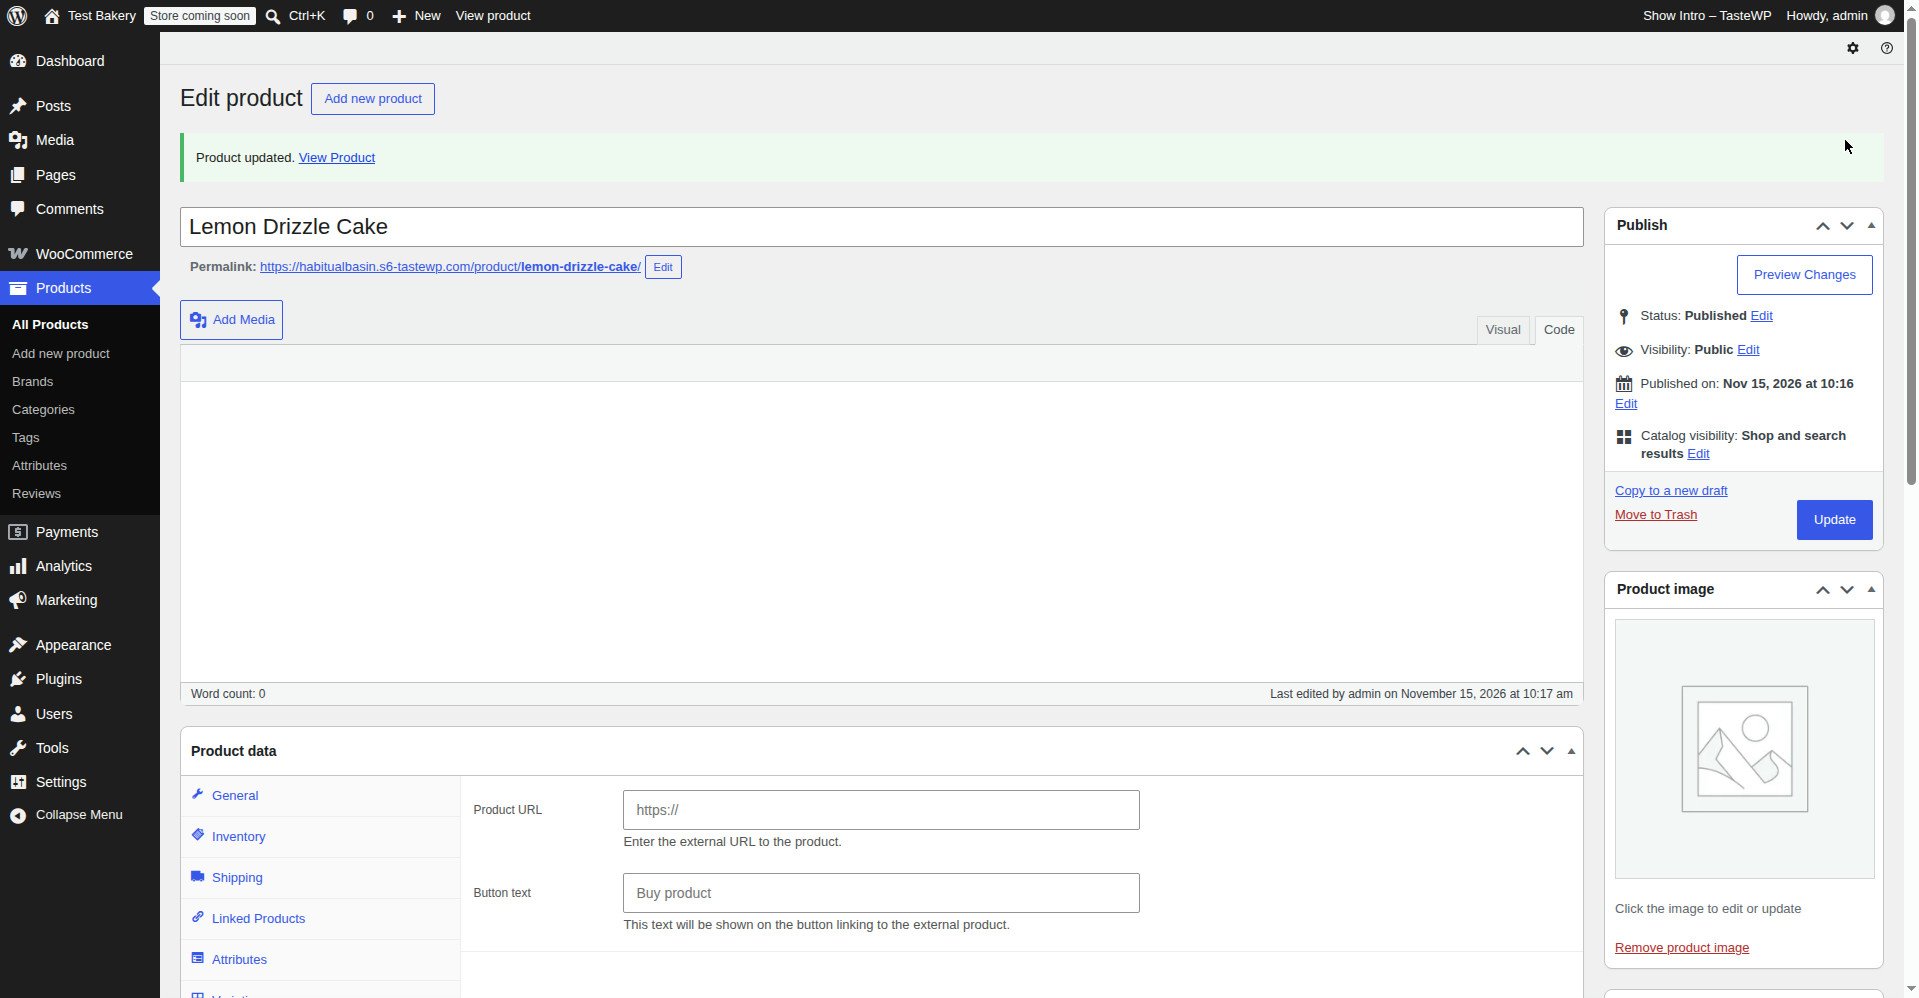
Test run for this guide (15 November 2026, WordPress test install), on the imported Lemon Drizzle Cake: the product image in every shot in this guide is the WooCommerce placeholder (grey picture icon), not a real photo. The “Product image” panel says “Set product image”, with the hint “For best results, upload JPEG or PNG files that are 1000 by 1000 pixels or larger”; the “Product gallery” panel says “Add product gallery images”. The featured image was set from the media dialog by selecting woocommerce-placeholder.webp (10 KB, 1200×1200) and clicking “Set product image”; the panel then showed the thumbnail with “Click the image to edit or update” and a “Remove product image” link. The gallery was added the same way — “Add product gallery images”, the same placeholder, “Add to gallery” — one thumbnail. Removal: hovering the thumbnail reveals a × (“Delete image”) that removes it instantly with no confirmation; the gallery is then empty while the featured image stays. Image sizes were left at the defaults in Customize → WooCommerce → Product Images: Main image width 600 (“Image size used for the main image on single product pages. These images will remain uncropped.”), Thumbnail width 300, Thumbnail cropping 1:1 (“Images will be cropped into a square”), with Custom 4:3 and Uncropped also available. Saving showed “Product updated.” (15 November 2026, 10:17 am). On the front end (/product/lemon-drizzle-cake/) the placeholder main image shows with the “View full-screen image gallery” magnifier, R189,00, “10 in stock”, SKU CAKE-LEM-20, Category Cakes, and no gallery thumbnails. Two quirks: after setting the featured image the panel briefly still showed “Set product image” (a transient render), and after saving, the Product data panel briefly showed External/Affiliate fields until “General” was clicked (a display glitch only; the data was intact).
Troubleshooting
| Symptom | Likely cause | Fix |
|---|---|---|
| WooCommerce product image not showing | No product image set, or the file was deleted from the Media Library | Set the product image again, and check the file still exists in Media → Library |
| Product image is blurry | The uploaded photo is smaller than the size WooCommerce needs to show | Upload a larger photo — at least 800 × 800, ideally 1200 × 1200 — and run Regenerate Thumbnails |
| Image is cropped the wrong way | Thumbnail cropping is set to 1:1 and the photo is not square | Set Thumbnail cropping to Uncropped, or use square photos |
| Gallery thumbnails show but clicking them does nothing | The theme does not support WooCommerce galleries, or the gallery JavaScript is not loading | Test with the Storefront theme; check the theme’s WooCommerce support |
| Variation image does not change | That variation has no image set, or no price, or is disabled / out of stock | Set an image on that variation, give it a regular price, tick Enabled, set stock status to In stock |
| Image shows in the admin but not on the shop page | The product is set to Draft, or catalog visibility is Hidden | Publish the product, and set Catalog visibility to Shop and search results |
| Image is the wrong way up | The photo’s EXIF orientation data was stripped on upload | Rotate the photo in an image editor before you upload it, and re-upload |
| Page loads slowly with images | Images are too large — several megabytes each | Compress before upload, resize to 1200 × 1200, and check the page on mobile data |
| Alt text is missing | Alt text was never filled in at upload | Open the image in Media → Library, fill in the Alt Text field, and save |
| Old image still shows after you changed it | Browser cache, or a caching plugin serving the old copy | Clear the cache in your caching plugin, and hard-refresh the page (Ctrl + Shift + R) |
Frequently asked questions
How do I add a product image in WooCommerce?
Edit the product, click Set product image in the Product image box on the right, choose a photo from the Media Library or upload a new one, click Set product image, and click Update. Add extra photos in the Product gallery box below it.
How do I add multiple images to a WooCommerce product?
Use the Product gallery box on the product edit screen. Click Add product gallery images, select the photos in the order you want them to appear, and click Add to gallery. The customer clicks the thumbnails under the main image to see them.
Why is my WooCommerce product image blurry?
Usually because the uploaded photo is smaller than the size WooCommerce needs to show. Upload the main image at 1200 × 1200 pixels, check the image size settings at Appearance → Customize → WooCommerce → Product Images, and run Regenerate Thumbnails if you changed the sizes after uploading.
How do I set a different image for each variation?
Edit the variable product, open the Variations tab, expand a variation, click the Image field, and choose the photo for that variation. Click Save changes and Update. The image changes on the product page when the customer picks that variation — as long as the variation has a price and is enabled.
What size should WooCommerce product images be?
Upload the main image at 1200 × 1200 pixels, as a JPG, under 300 KB if you can. WooCommerce will make smaller copies for the shop grid and thumbnails. Square photos crop cleanly at every size.
Do I need a plugin for product images?
No. Adding a product image, a gallery, and a variation image all work in WooCommerce core, free, as it ships. A plugin such as Smush (free) is useful for compressing images, and Regenerate Thumbnails (free) is useful if you change image sizes after uploading — but neither is required to add images.
Next steps
Images are what make a product page sell. The rest of the series builds on them:
- How to Add Products in WooCommerce — the first article in this series. If you have not added a product yet, start there: name, description, image, category and publish.
- How to Set Sale Price in WooCommerce — regular price, sale price, schedules, stock and SKU, so the product you have just photographed is priced and stocked correctly.
- How to Add Variable Products in WooCommerce — sizes, colours and options, with a different image for each variation, and the failures that hide variations from your store.
- How to Import Products in Bulk to WooCommerce with CSV — product images by URL or filename in a spreadsheet, including the “images not importing” trap mentioned in this article.
Do one product properly first — main image, three gallery images, Alt text on every photo, all under 300 KB — and check it on the front end on your phone, on mobile data. Then do the next one. A store with ten products whose photos are sharp, honest and fast to load will sell better than a store with a hundred products whose photos are blurry, missing, or slow.
Written by Mohd Shah Ahmad, Learn WordPress Online. He builds and runs live WooCommerce stores in Pretoria, and manages the live stores Stanley’s Bakery (stanleysbakery.co.za) and Aaliyah Perfumes (aaliyahperfumes.co.za). Tested on a WordPress test install — see the “Tested on” box at the top.