
Quick answer
The WordPress block editor, also called Gutenberg, builds every post and page from blocks: a paragraph is a block, a heading is a block, and so is an image, a button, or a list. Open a post or page, click where you want to write, type, and press the plus (+) button whenever you need a different kind of block.
This guide is part of the Start with WordPress hub. If you have not built your site yet, start with how to make a website with WordPress, then learn how to create a menu in WordPress and how to install a WordPress plugin. Remember three things: work block by block, preview before you publish, and when something breaks, change one thing at a time, starting with the least destructive fix. The first part is a short how-to. The second, longer part fixes the five problems beginners search for most.
Tested on
- WordPress version: 7.1.4
- Theme: GeneratePress 3.6.1
- Plugins active during testing: WooCommerce 11.3.0
- PHP version: 8.4.27
- Browser tested in: Chrome (desktop)
- Test date: 15 November 2026
Tested 15 November 2026 on a WordPress test install.
What the block editor is
The block editor replaced the old Classic Editor as the default WordPress editor. You may still see it called Gutenberg, its original project name.
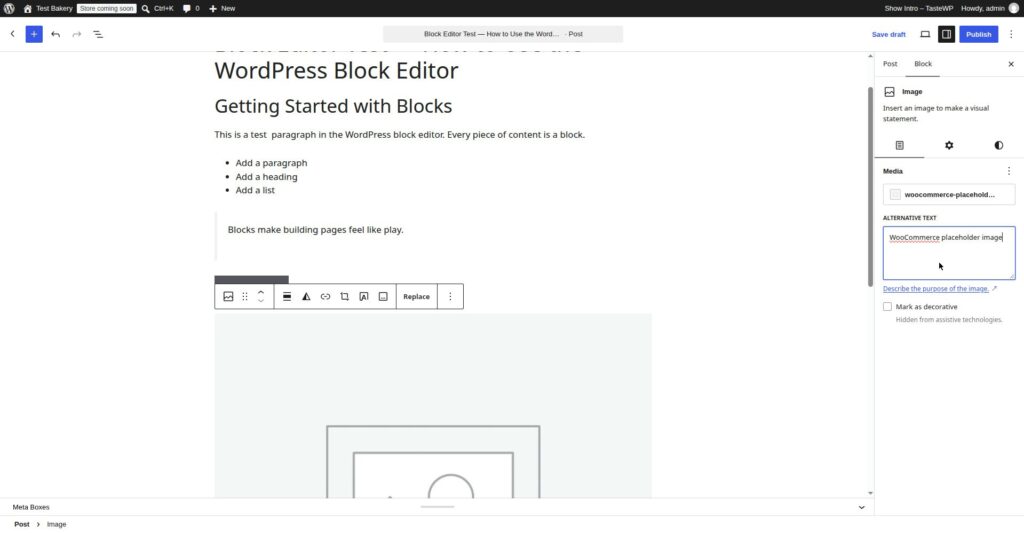
Each block has its own settings — a paragraph for alignment or font size, an image for size or alt text, a heading for its level (H2 to H6) — and the toolbar and settings panel change depending on what you have selected.
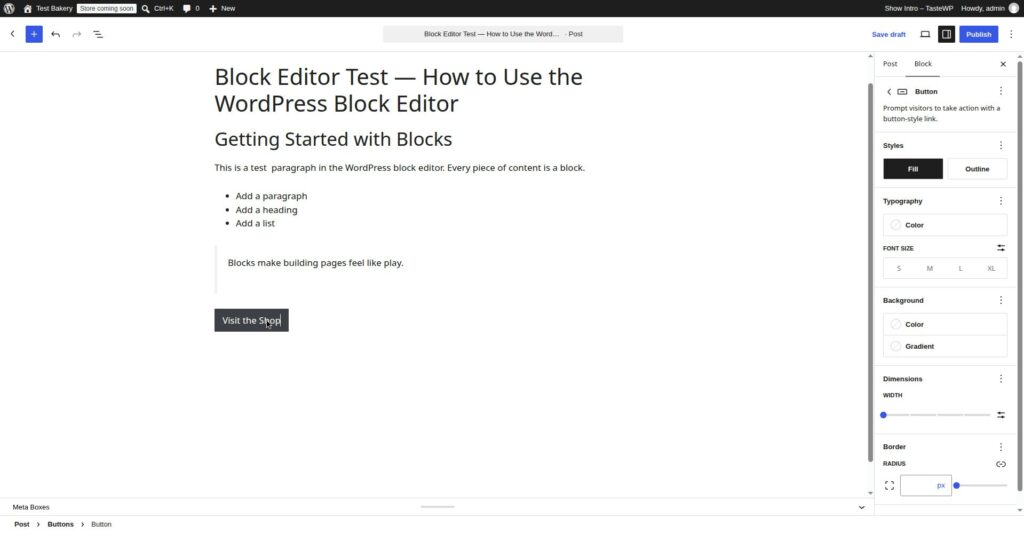
The editor has three main areas: your content, the toolbar at the top (Undo, plus (+), Save, Preview, Publish), and the settings panel on the right — click the gear icon if it is missing. Most posts only need paragraphs, headings, images, lists, and buttons. Learn those five well.
The short how-to: write and publish a post
Open the editor and add your first blocks
Go to Posts > Add New Post. Type your title, click into the paragraph underneath, and start writing. Press Enter to create a new paragraph block.
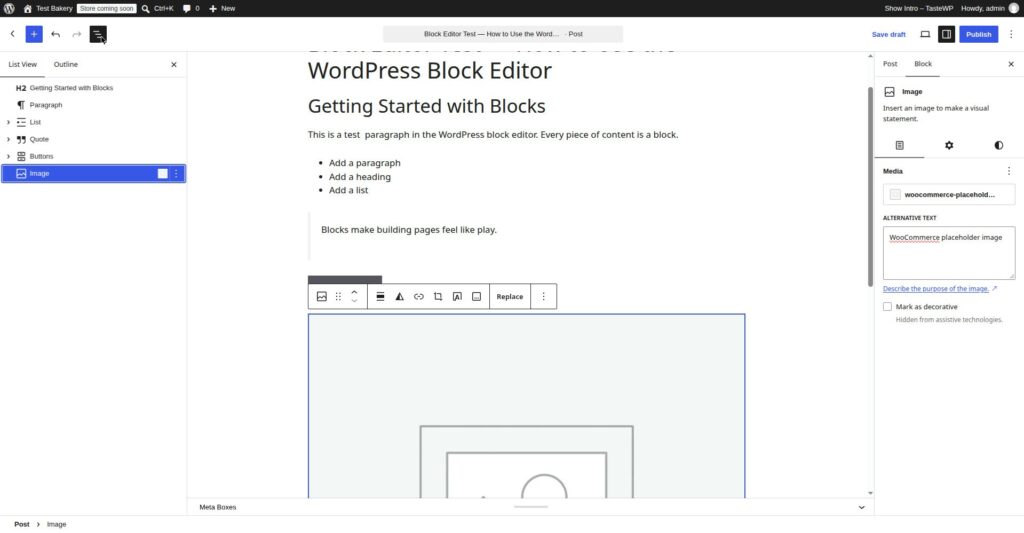
To add a different block, click the plus (+) button, or type / on a new empty line and then the block name, for example /heading or /image. Use List View — the three-line icon at the top left — when a post gets long: it shows every block in order.
Headings, lists, and basic formatting
Use one H1 for the post title — WordPress usually adds this from your title field — then H2 for main sections and H3 for sub-sections. Do not skip levels, and do not use a heading just to make text bigger.
To add a heading, type /heading, choose the level, and type the text. For a list, type /list and choose bulleted or numbered. To format text, select it and use the small toolbar that appears: bold, italic, and link are the three you will use most.
Add an image
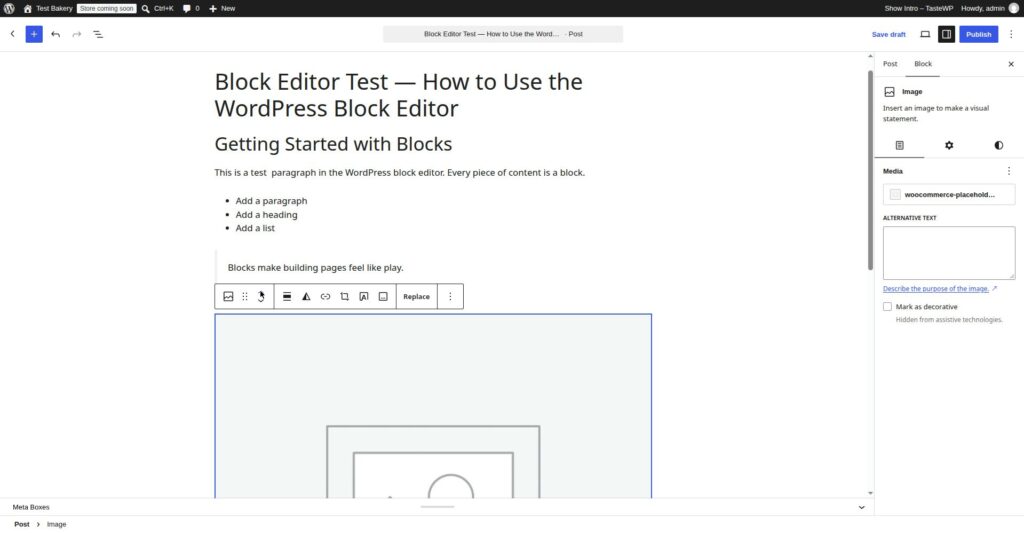
Click the plus (+) button or type /image, then choose Upload, Media Library, or Insert from URL. Click the image after it appears to set its alignment, size, alt text, and link.
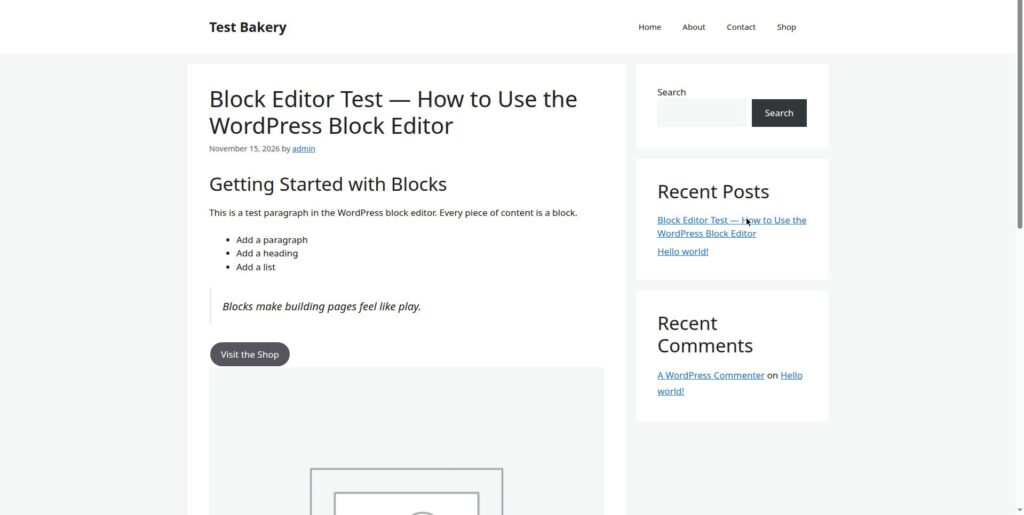
Always fill in the alt text: it describes the image for screen readers and search engines, and it is what shows if the image fails to load. Write what the image actually shows, in plain words. Keep images reasonably sized before you upload them: very large files slow your site down and cause the upload errors below. In the test post, the image’s alt text was “WooCommerce placeholder image” — the image used was the WooCommerce placeholder, not a real photo.
How to add a button in WordPress block editor
Type /buttons on a new line, or add a Buttons block from the plus (+) menu. Click the button that appears, type its label, then click the link icon and add the destination URL. Links to your own site should open in the same tab; links to other sites in a new tab, so readers do not lose your post. Preview the post to confirm the link works.
Move, duplicate, and delete blocks
Hover over a block to see up and down arrows on its left edge, plus a six-dot handle you can drag. The block toolbar’s three-dot menu has Duplicate, Copy, Delete, and more. Delete removes the block entirely, so use Undo (Ctrl+Z on Windows, Cmd+Z on Mac) straight away if you remove the wrong one.
Patterns and reusable blocks
A pattern is a ready-made arrangement of blocks — a call-to-action section, a two-column layout, or a pricing table. Add one from the plus (+) menu under the Patterns tab, then edit its text and images. A synced pattern — previously called a reusable block — stays linked: edit it in one place and every post using it updates. An unsynced pattern is a one-off copy.
Preview and publish
Before publishing, click Preview at the top right and choose Preview in new tab. Check headings, images, button links, and spacing on desktop and mobile widths.
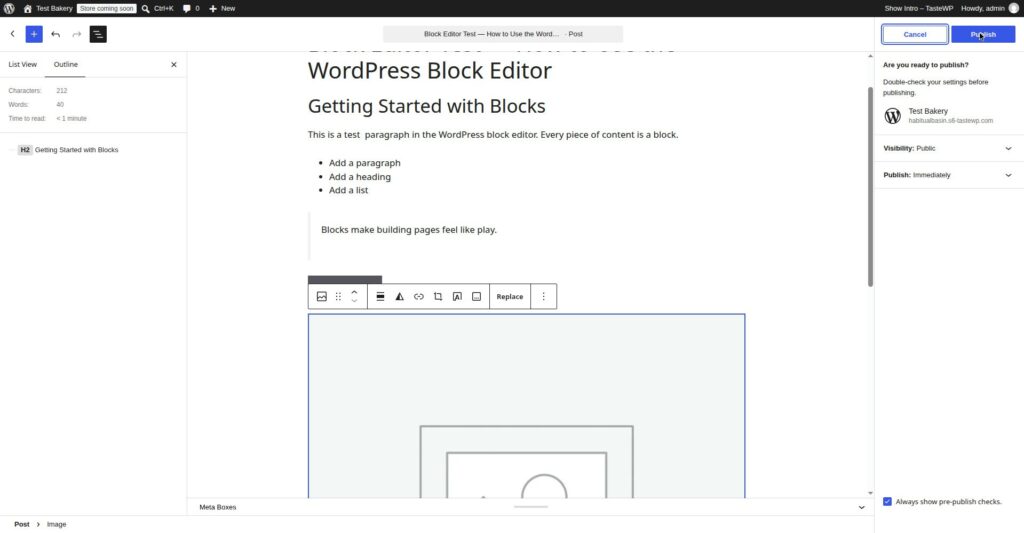
When ready, click Publish, review the summary panel, and click Publish again. Then open the live post and click through every link and button once. If you spot a mistake, edit the post and click Update. To restore an earlier version, use the Revisions link in the settings panel.
How to enable Gutenberg block editor / block editor not showing
If you open a post and see the old Classic Editor instead of blocks, the block editor is probably disabled rather than broken — usually by the Classic Editor plugin. Go to Plugins > Installed Plugins and check whether it is active. If it is, deactivate it to restore the block editor, but check with whoever manages the site first.
Another possibility is your user role: a restricted role or membership plugin may limit what you see, so ask an administrator to check it under Users > All Users. If the editor loads but shows a blank white area, see the first error below.
Troubleshooting: the five errors beginners hit most
Fixes below are ordered least destructive first. Try one, test, and stop as soon as the problem clears. Do not apply three fixes at once. Before any step that touches plugins or themes, make sure you have a recent backup.
WordPress block editor not working / block editor not loading — fix
What you see: the editor page loads, but the content area is blank, spinning, or frozen. You cannot type, or the toolbar never appears. The rest of the dashboard works normally.
Try first — rule out the browser. Hard-refresh (Ctrl+Shift+R on Windows, Cmd+Shift+R on Mac), then try the editor in a private or incognito window. If it works there, a browser extension or cached files are the likely cause: disable extensions one at a time, starting with ad blockers, and clear the browser cache. Also try a different browser.
Next — check for a plugin conflict. Deactivate all plugins, and try the editor again. If it works, reactivate them one at a time until the problem returns — the last one reactivated is the cause. If that does not help, switch briefly to a default WordPress theme, such as Twenty Twenty-Three, and test again.
Next — check the browser console. Press F12, open the Console tab, and reload the editor. Red error messages name the file or plugin that failed to load — copy the exact error before searching for it. A blank editor can also come from a server problem; check the site’s error log if you have access, or ask your host.
No screenshot: the blank-editor fault was not reproduced on the test install — the editor loaded normally and the test post was written and published in it.
This block contains unexpected or invalid content — how to fix
What you see: a block shows a warning saying “This block contains unexpected or invalid content”, with options to Attempt Block Recovery, Convert to HTML, or Resolve the issue.
Try first — Attempt Block Recovery. Click it on the affected block. WordPress compares what it expected with what it found and rebuilds the block if it can. If recovery works, save the post and check the live page. If the warning appears again after saving, move on.
Next — find out what changed. This warning usually appears because something edited the block’s underlying HTML outside the editor: a plugin, a theme update, a paste from another tool, or editing the post in the Classic Editor or a page builder. If a plugin was updated just before it appeared, check its changelog first.
Next — Convert to HTML, carefully. If recovery fails, use the block’s three-dot menu and choose “Convert to HTML”. This keeps the visible content but turns it into a plain HTML block without the normal block controls. For a paragraph or heading, it is often quicker to delete the block and retype it.
Avoid — editing the block HTML by hand unless you know HTML. “Edit as HTML” shows the block’s code, including the comment markers WordPress uses to recognise it; deleting one will make the warning worse. If the warning appears on many blocks at once, find the plugin or theme change that caused it first.
Updating failed. The response is not a valid JSON response — WordPress
What you see: you click Update or Publish and WordPress shows “Updating failed. The response is not a valid JSON response” (or “Publishing failed. The response is not a valid JSON response”). Your changes are not saved.
Try first — save the permalink settings. Go to Settings > Permalinks and click Save Changes without changing anything. This refreshes the rewrite rules WordPress uses for its editor requests. Then try updating the post again.
Next — test for a plugin or security conflict. The block editor saves through the WordPress REST API, and some security plugins, firewalls, or server rules block those requests. Deactivate security plugins first, then test the update. If it works, reactivate them one at a time until the error returns, then check that plugin’s settings for a rule blocking the editor.
Next — check the site address settings. Go to Settings > General and confirm the WordPress Address and Site Address match how you actually visit the site, including https if your site uses it. Change these only if you are sure they are wrong, and note the old values first — a wrong address can lock you out of the dashboard.
Last — check the REST API directly. Visit yoursite.com/wp-json/ in your browser (replace yoursite.com with your domain). You should see a page of JSON data. If you see an error page, a login screen, or a security warning instead, the REST API itself is blocked, and the fix is at the server or security-plugin level. Send that result, plus the exact error message, to your host’s support. The /wp-json/ index page itself was not opened during this test run, but the test post published without a JSON error, so the REST API was working on the test install.
No screenshot: the JSON error was not reproduced on the test install — the test post published and updated without it.
WordPress image won’t upload HTTP error (in the block editor)
What you see: you add an Image block, choose a file, and the upload fails with “HTTP error”, or the image appears as a broken thumbnail. Other blocks work fine.
Try first — shrink the image and try again. Large images are the most common cause. Resize the image on your computer before uploading, and save it as a JPG for photos or a PNG for graphics with sharp lines. If the smaller file uploads and the original does not, the problem was size, not the editor. On the test install, the maximum upload file size is 60 MB.
Next — rename the file and check the format. Remove spaces, special characters, and very long names — for example, rename My Photo (final!!).png to my-photo.png. WordPress accepts JPG, PNG, GIF, and WebP by default; if your file is in an unusual format, convert it to JPG or PNG first.
Next — check the upload limit and the uploads folder. Go to Media > Add New and look for the maximum upload file size shown there. If your file is larger than that limit, the fix is a smaller file, or a higher limit set by your host. If the file is well under the limit and still fails, ask your host to check the uploads folder permissions. On the test install the limit shown is 60 MB, and files go to wp-content/uploads/.
Next — test for a plugin conflict and a server limit. Deactivate image-optimisation and security plugins one at a time and retry the upload. If uploads fail for every file, ask your host to check the server error log and the PHP memory and timeout limits. Keep a note of the exact file name, size, and format that failed; support will ask for all three.
WordPress formatting lost when pasting from Word / Google Docs
What you see: you paste text from Microsoft Word or Google Docs and the headings, bold text, lists, or spacing disappear — or the opposite happens, and the pasted text arrives with strange fonts, colours, and spacing that do not match the rest of the post.
Try first — paste without formatting, then reformat in the editor. Paste using Ctrl+Shift+V on Windows or Cmd+Shift+V on Mac. That pastes plain text, with no hidden formatting. Then apply headings, bold, and lists using the block editor’s own controls. It takes a few extra minutes, but it is the most reliable method. For a long document, paste in sections and check each one as you go.
Next — if you paste normally, check what actually arrived. A normal paste (Ctrl+V) keeps some formatting, but Word and Google Docs use different code underneath from WordPress: a heading may arrive as a large bold paragraph instead of a real H2, and a list as separate paragraphs with bullet characters typed in by hand. After pasting, check each heading and list’s block type, and convert any fake heading or list to the real block type.
Watch for — hotlinked Google Docs images. Images copied from Google Docs sometimes paste as links back to Google’s servers instead of files in your Media Library, so the image can break later. After pasting, click each image and check where it is hosted; if it is not in your Media Library, download it and upload it to WordPress properly. The same applies to images pasted from Word: save them as files first.
Watch for — duplicate H1s and hidden styles. A Word document often has its own title at the top. If you paste that title as well as typing a WordPress title, the page ends up with two H1s — delete the pasted title and keep only the WordPress title field. Also reset any leftover font colours and sizes. Pasting from Word or Google Docs was not tested on the test install in this run.
No screenshot: pasting from Google Docs was not tested on the test install in this run, so there is no before-and-after example to show.
Gutenberg vs Classic Editor: a short comparison
The Classic Editor is one long text area with a formatting toolbar, like a word processor. The block editor splits the post into blocks, each with its own settings, and is better for layouts — columns, buttons, patterns, and embedded content. The Classic Editor is simpler if you only ever write plain paragraphs.
Do not switch back and forth on a post that is already written: opening a block-built post in the Classic Editor and saving it can break blocks.
When to ask for help
Most block-editor problems are fixed by the steps above. Ask for help — from your host, a developer, or the support forum for the plugin or theme involved — when the editor is blank on every post and the plugin/theme test does not fix it; the JSON error persists after the permalink save and the security-plugin test; uploads fail for every file; or the error mentions the database, file permissions, or a server limit you cannot change from the dashboard.
When you ask, include the exact error message, copied word for word; what you were doing when it appeared; the fixes you already tried and what each one did; and your WordPress, theme, and plugin versions. Do not share your admin password, hosting login, or database details in a forum.
This guide was written from the author’s experience building and running live WordPress and WooCommerce sites, including Aaliyah Perfumes (aaliyahperfumes.co.za) and Stanley’s Bakery (stanleysbakery.co.za). Every site is different, so test each fix on your own install before treating it as settled. The steps in this guide were checked on a WordPress test install on 15 November 2026 — not on those live sites.
Next steps
Start with one post. Write it block by block, add one image and one button, preview it, and publish it. Then break something on purpose on a test post — paste a formatted paragraph from Google Docs, or upload an oversized image — and practise fixing it before you need to on a live post.
When you are comfortable with the editor, the next article in this series covers installing plugins — including the errors that stop an install.
— Mohd Shah Ahmad, WordPress & WooCommerce specialist based in Pretoria, South Africa. Learn WordPress Online.