
You picked “admin” when you set up WordPress, or a username you no longer want, and now you want it changed. Open Users > Profile and you will see the problem: the Username field is greyed out, with the text “Usernames cannot be changed.” WordPress really does not offer a rename button. But the username can still be changed — two ways work, and we tested both on 20 November 2026. The quick way is a free plugin that renames the user in place. The no-plugin way is to create a new admin user, move everything to it, and delete the old one. There is also a third option that looks like a rename but is not: changing your display name, which we tested too.
Tested on: WordPress 7.1.5 on two WordPress test installs, tested on 20 November 2026. Install 1: Twenty Twenty-Three theme version 1.7, PHP 8.5.12. Install 2: Twenty Twenty-Five theme version 1.5, PHP 8.3.36. Plugin used: Username Changer 3.3.1 by DigitalME (free).
Before you start
- Your username is what you log in with. Your display name is what visitors see. They are different things. Changing your display name (Method 3) changes the name shown next to your posts, but you still log in with the old username. If you want the login name itself changed, you need Method 1 or Method 2.
- Know your password before you start. Renaming your username logs you out immediately — WordPress forces you to log back in. Your password does not change, so have it ready and log back in with the new username and the same password.
- Do this on a site you can get back into. If you are the only admin and you rename that account, you must be able to log in again as the new name. We tested the re-login and it worked, but do not start this if you have forgotten your password — reset it first.
Method 1: Rename the username with a free plugin
This is the fastest way. It changes the username in place, keeps all your posts, comments and settings on the same user, and takes about two minutes.
- Install the free Username Changer plugin from Plugins > Add Plugins — see our guide on how to install a WordPress plugin — and activate it. The version we tested is 3.3.1 by DigitalME.
- Go to Users > Profile. The Username field is still read-only — but the plugin has added a “Change Username” link next to it.
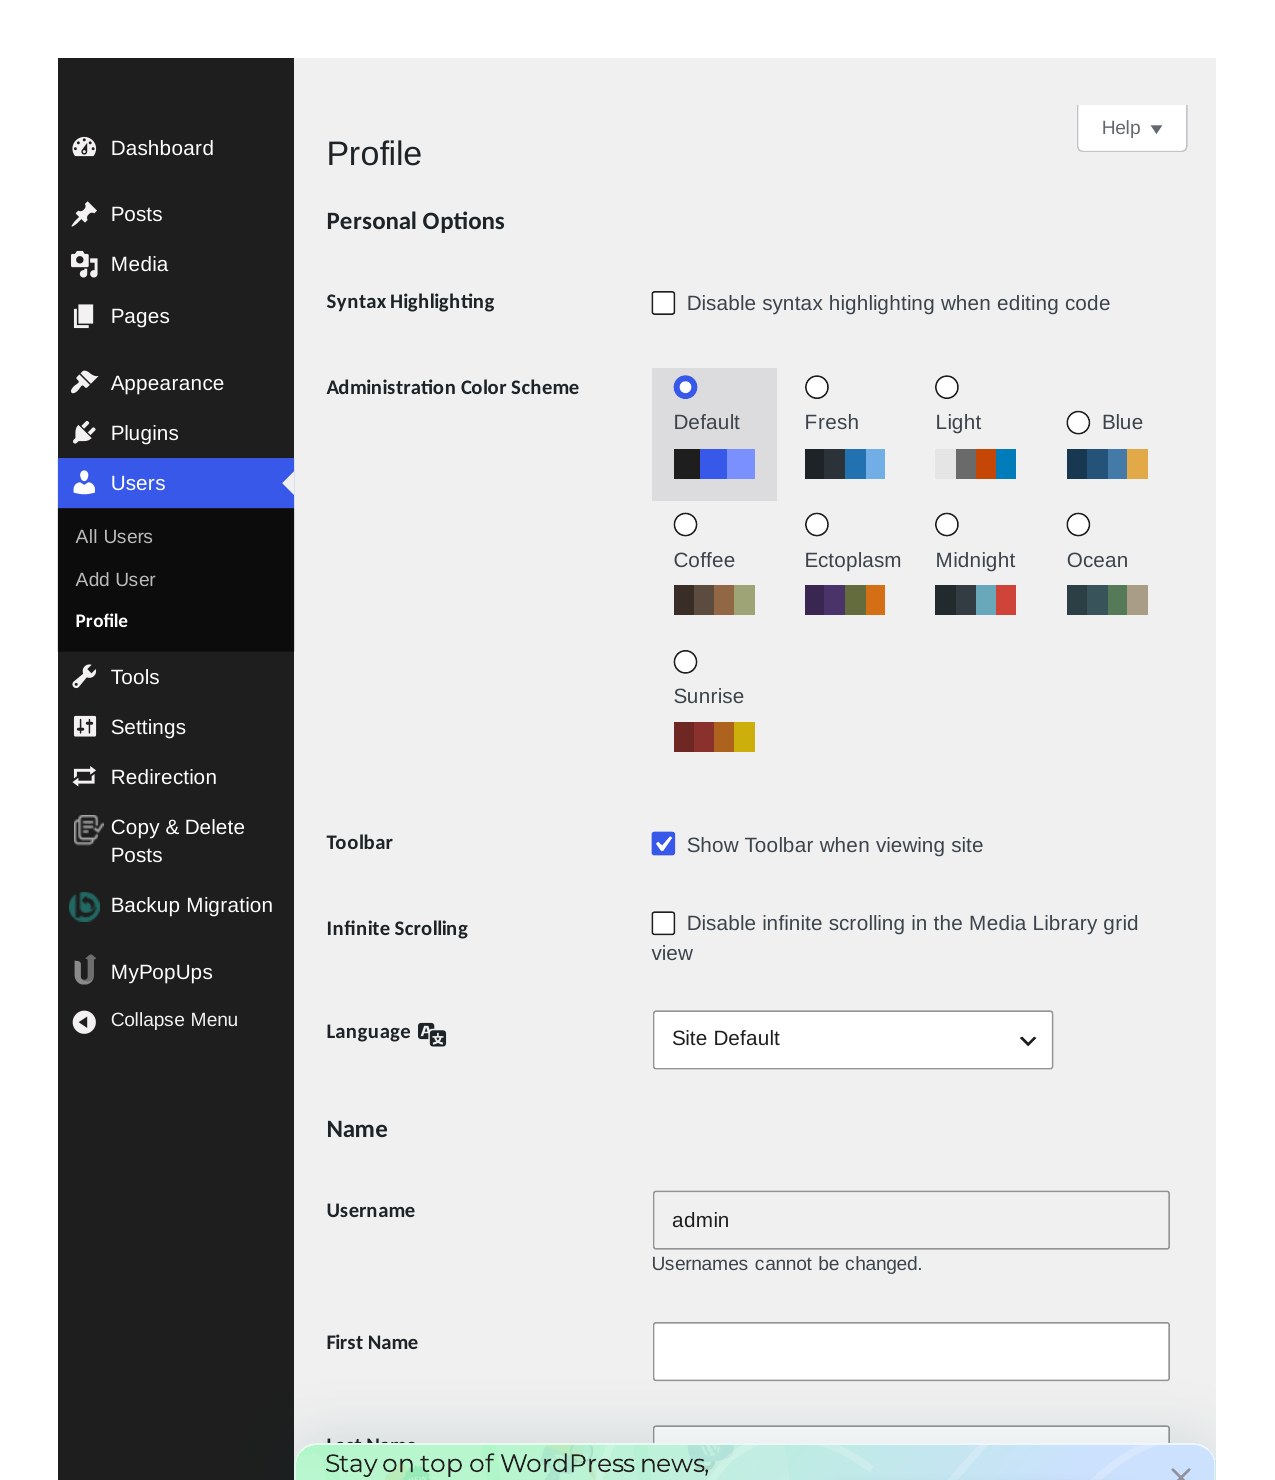
- Click “Change Username”. The field becomes editable, with Save Username and Cancel buttons.
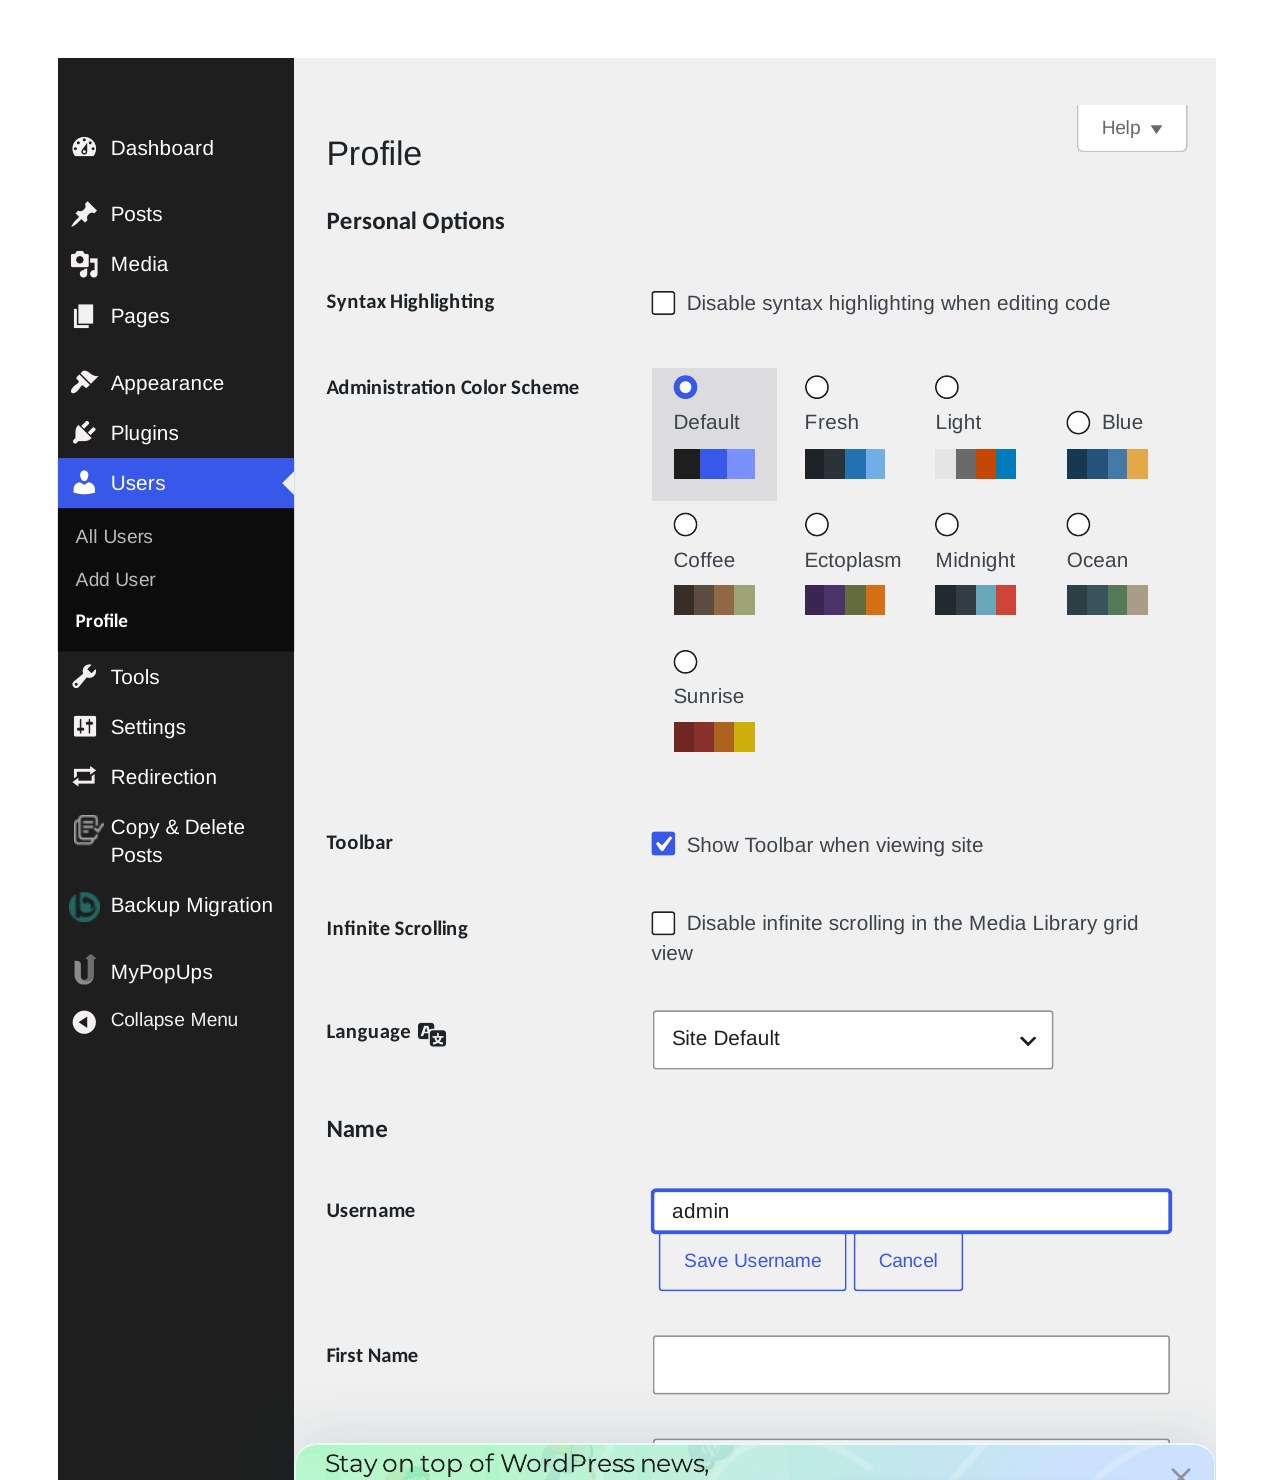
- Type the new username and click Save Username. WordPress shows the green confirmation “Username successfully changed to siteeditor. Click here to log back in.”
- Log back in with the new username and your same password. The password does not change when the username does.
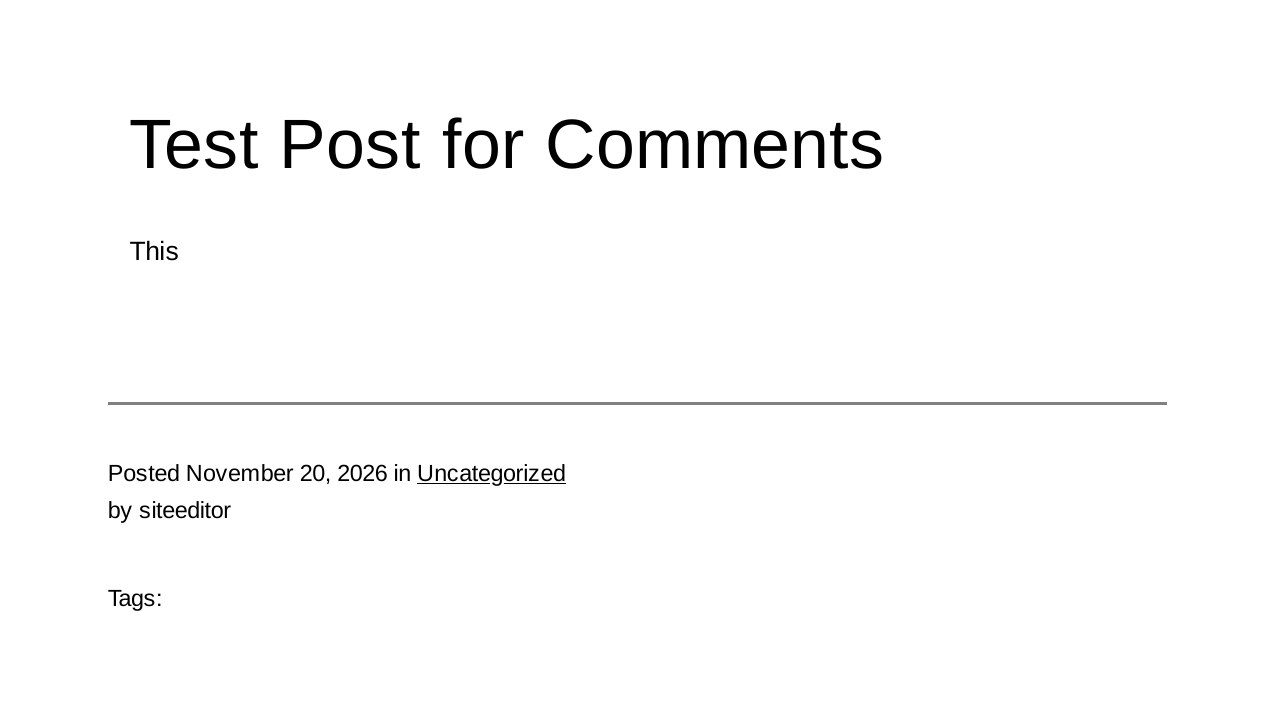
On our test install we renamed “admin” to “siteeditor”. The rename worked: a post that had shown “by admin” now showed “by siteeditor” on the front end, and logging back in with “siteeditor” and the unchanged password opened the dashboard. The Users list confirmed it afterwards: a single user, username “siteeditor”, role Administrator, with its post still attached.
Two things to know about this plugin, both found during testing. First, there is no “Change Username” option in the Users > All Users hover menu (only Edit and View) — the rename link lives on the Profile page, next to the Username field. Second, the plugin’s Settings page does not do the rename; it only sets allowed roles, a minimum username length and email options. And one small quirk: after the rename, the Nickname changed automatically to the new username while the display name stayed as it was, and the “Display name publicly as” dropdown still listed the old username as a stale option. None of that stops the rename working.
Method 2: Create a new admin user and delete the old one (no plugin)
If you would rather not install a plugin, this is the way. It takes longer and you end up with a different user account, but it uses only WordPress itself.
- Go to Users > Add User and create a new user. Give it a username you want to keep, a real email address, and the Administrator role. Use a strong password — WordPress generates one for you on the form — and save it somewhere safe, because you are about to log in with it.
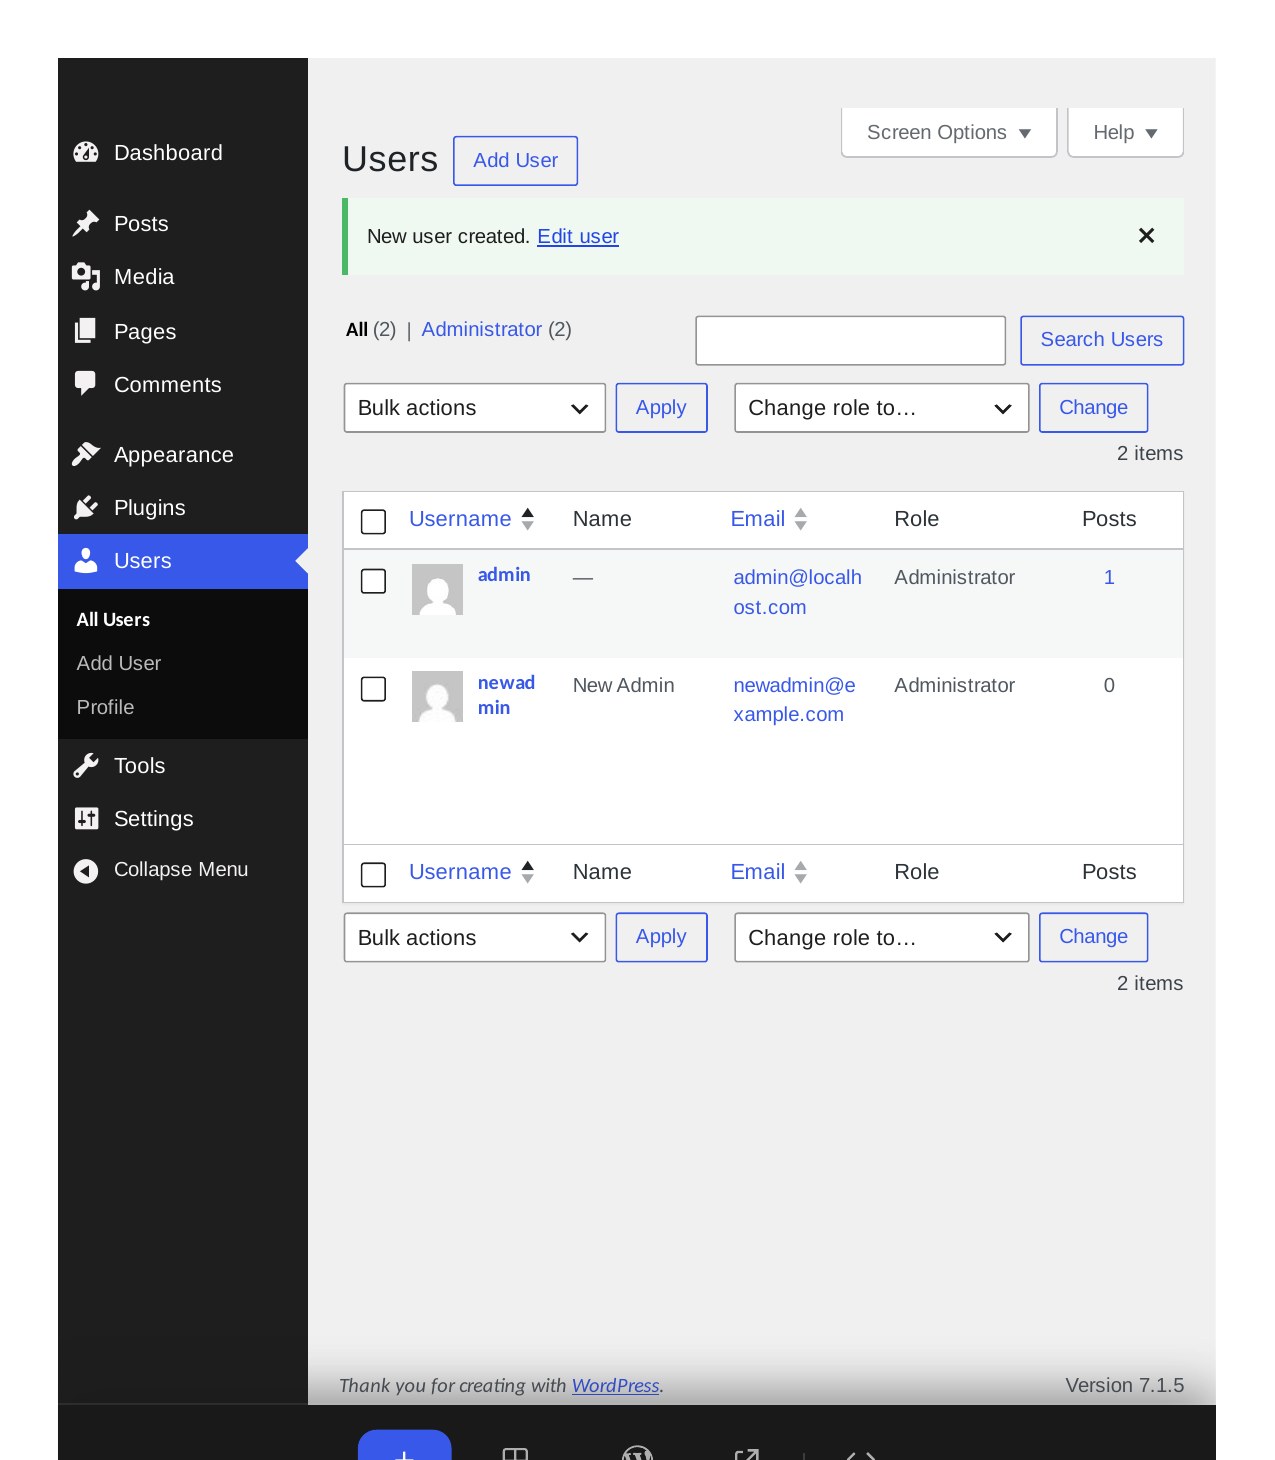
- Make sure the new user was created with the Administrator role. On our test install the Users list showed the new user “newadmin” (New Admin) as Administrator, next to the original “admin”.
- Log out, then log back in as the new user with its password.
- Go to Users > All Users, hover over the old user, and click Delete.
- WordPress asks “What should be done with the content owned by this user?” Choose “Attribute all content to” and pick the new user from the dropdown — do not choose “Delete all content”, or the old user’s posts are deleted with it. Then click Confirm Deletion.
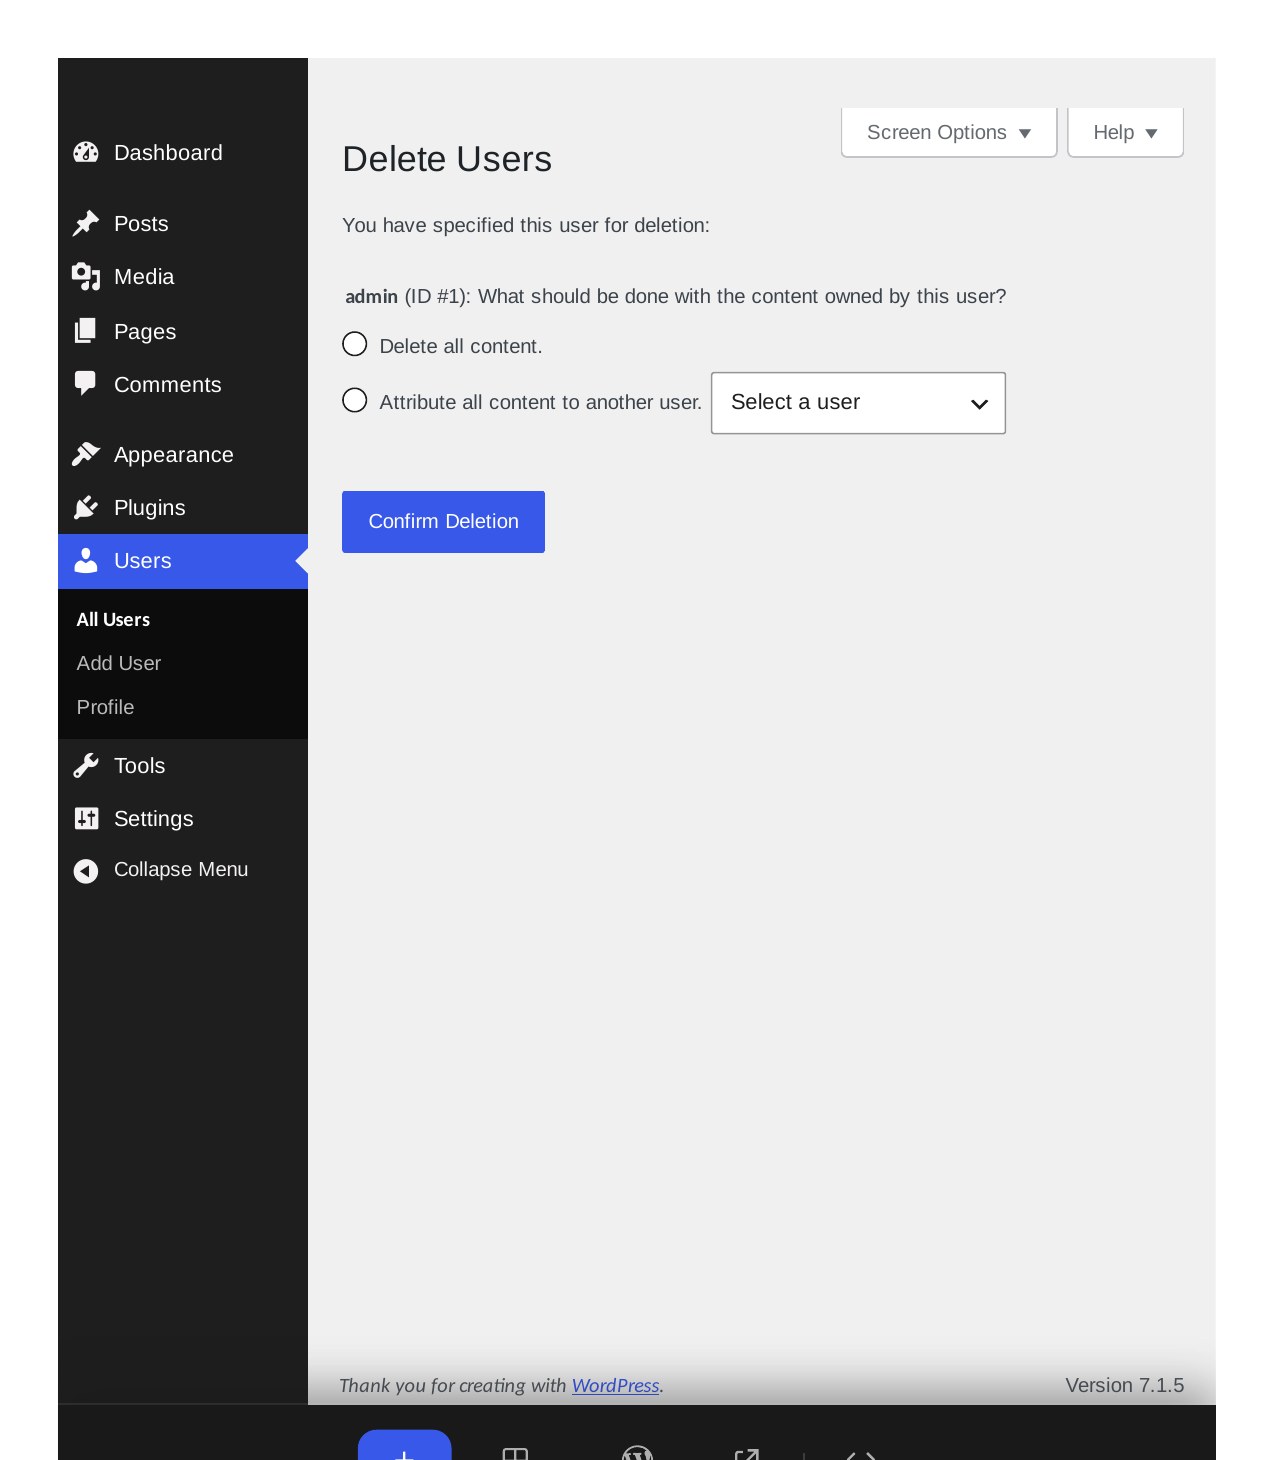
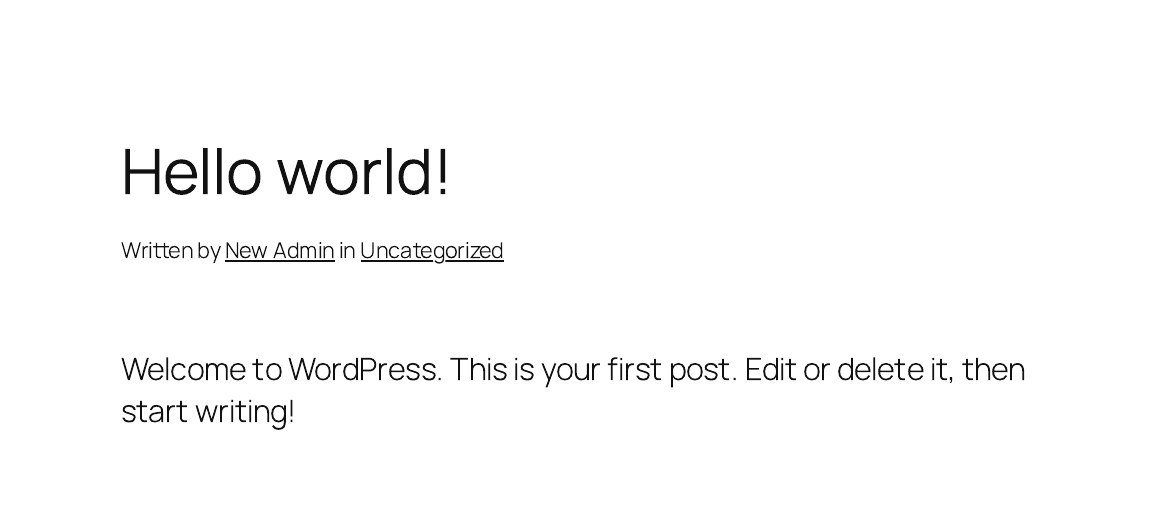
- Check that it worked. On our test install the Users list showed only the new user, with 1 post, and the site’s “Hello world!” post was now authored by the new user — the front end read “Written by New Admin”.
Do the steps in this order. Do not delete the old user before you have logged in as the new one — if the new user’s password does not work, you need the old account to get back in. And always pick “Attribute all content to” at step 5; that is the step that keeps your posts.
Method 3: Change the display name instead (not a username change)
If you only want a different name shown next to your posts — a real name instead of “admin”, for example — you do not need to change the username at all.
- Go to Users > Profile.
- Under Name, set a Nickname — for example “Site Editor”.
- Under “Display name publicly as”, choose that nickname from the dropdown.
- Click Update Profile. WordPress shows “Profile updated.”
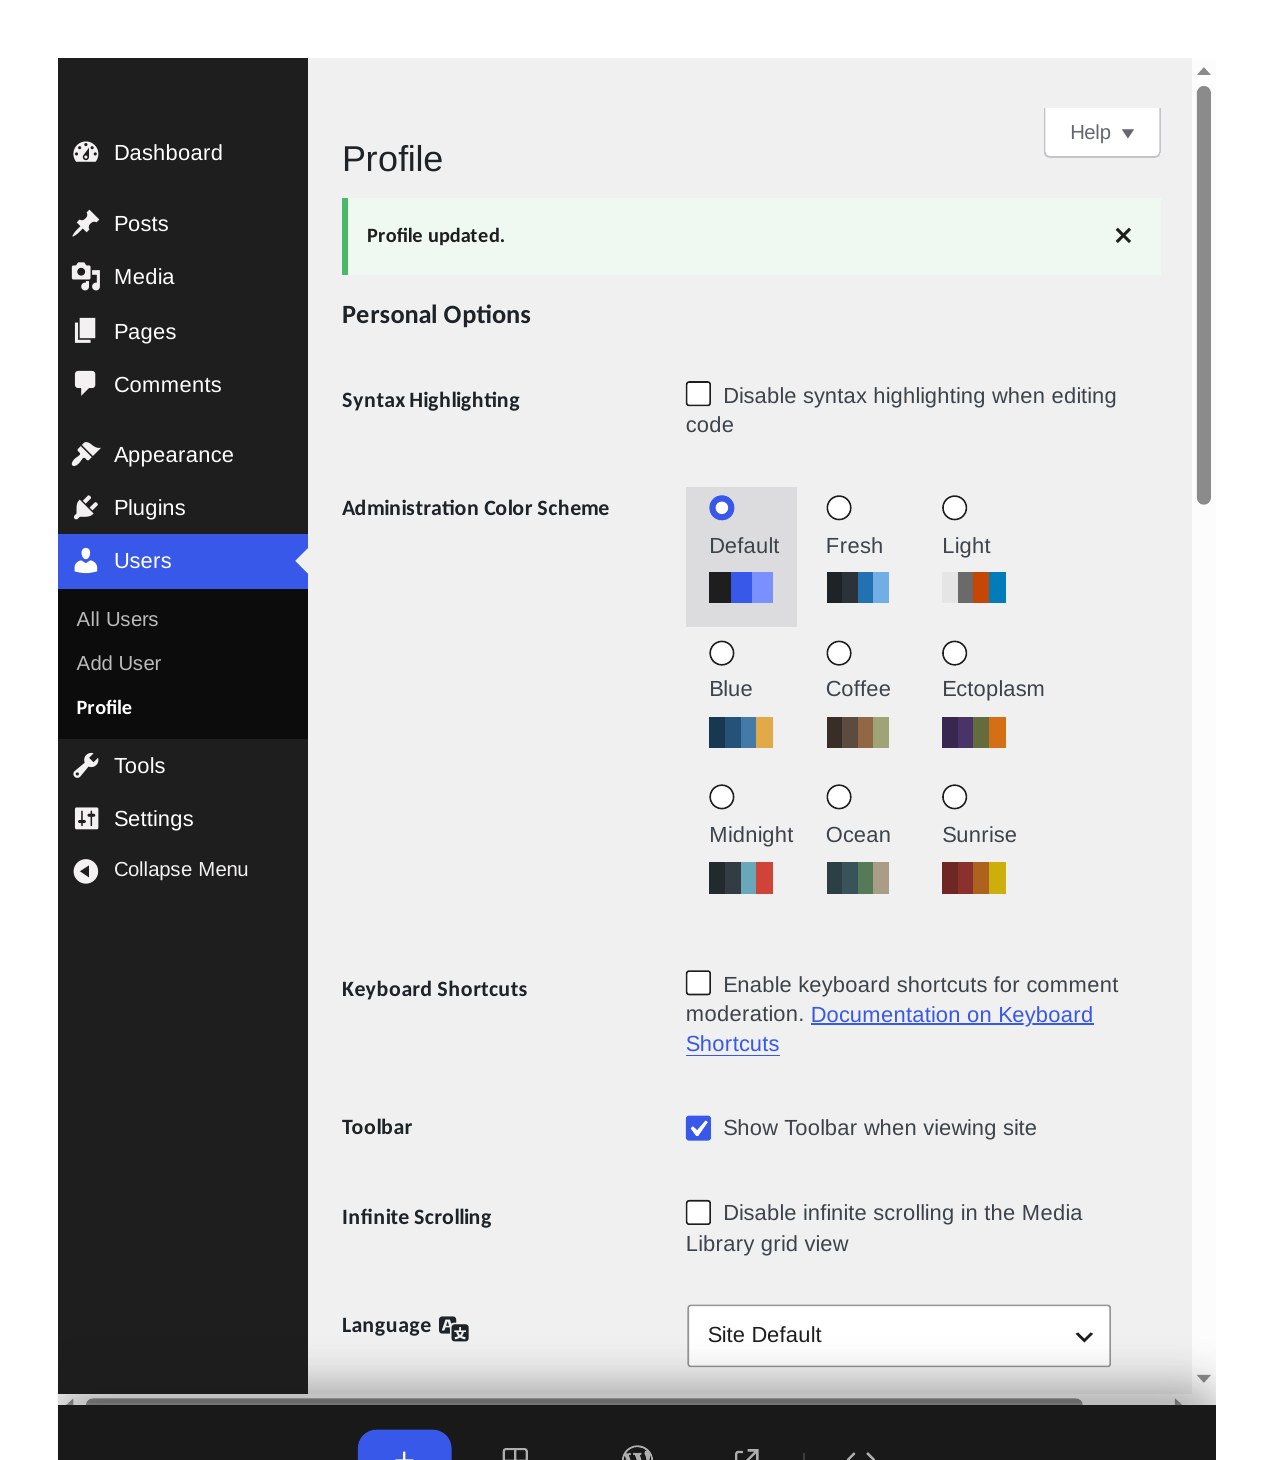
We tested this: after the change, the toolbar read “Howdy, Site Editor” and the Users list offered a “View posts by Site Editor” link — but the login username was still “admin”. One honest nuance: in the Users list, the Name column itself showed “—” (blank) rather than “Site Editor”. The change shows in the toolbar and in the posts link, not in that column. So use this method when the public name is all you want to change — and do not expect it to change your login.
Before and after: the proof it works
Before the rename, the test post showed “by admin”. After Method 1, the same post showed “by siteeditor”, and after logging back in with the new name the Users list showed a single user:
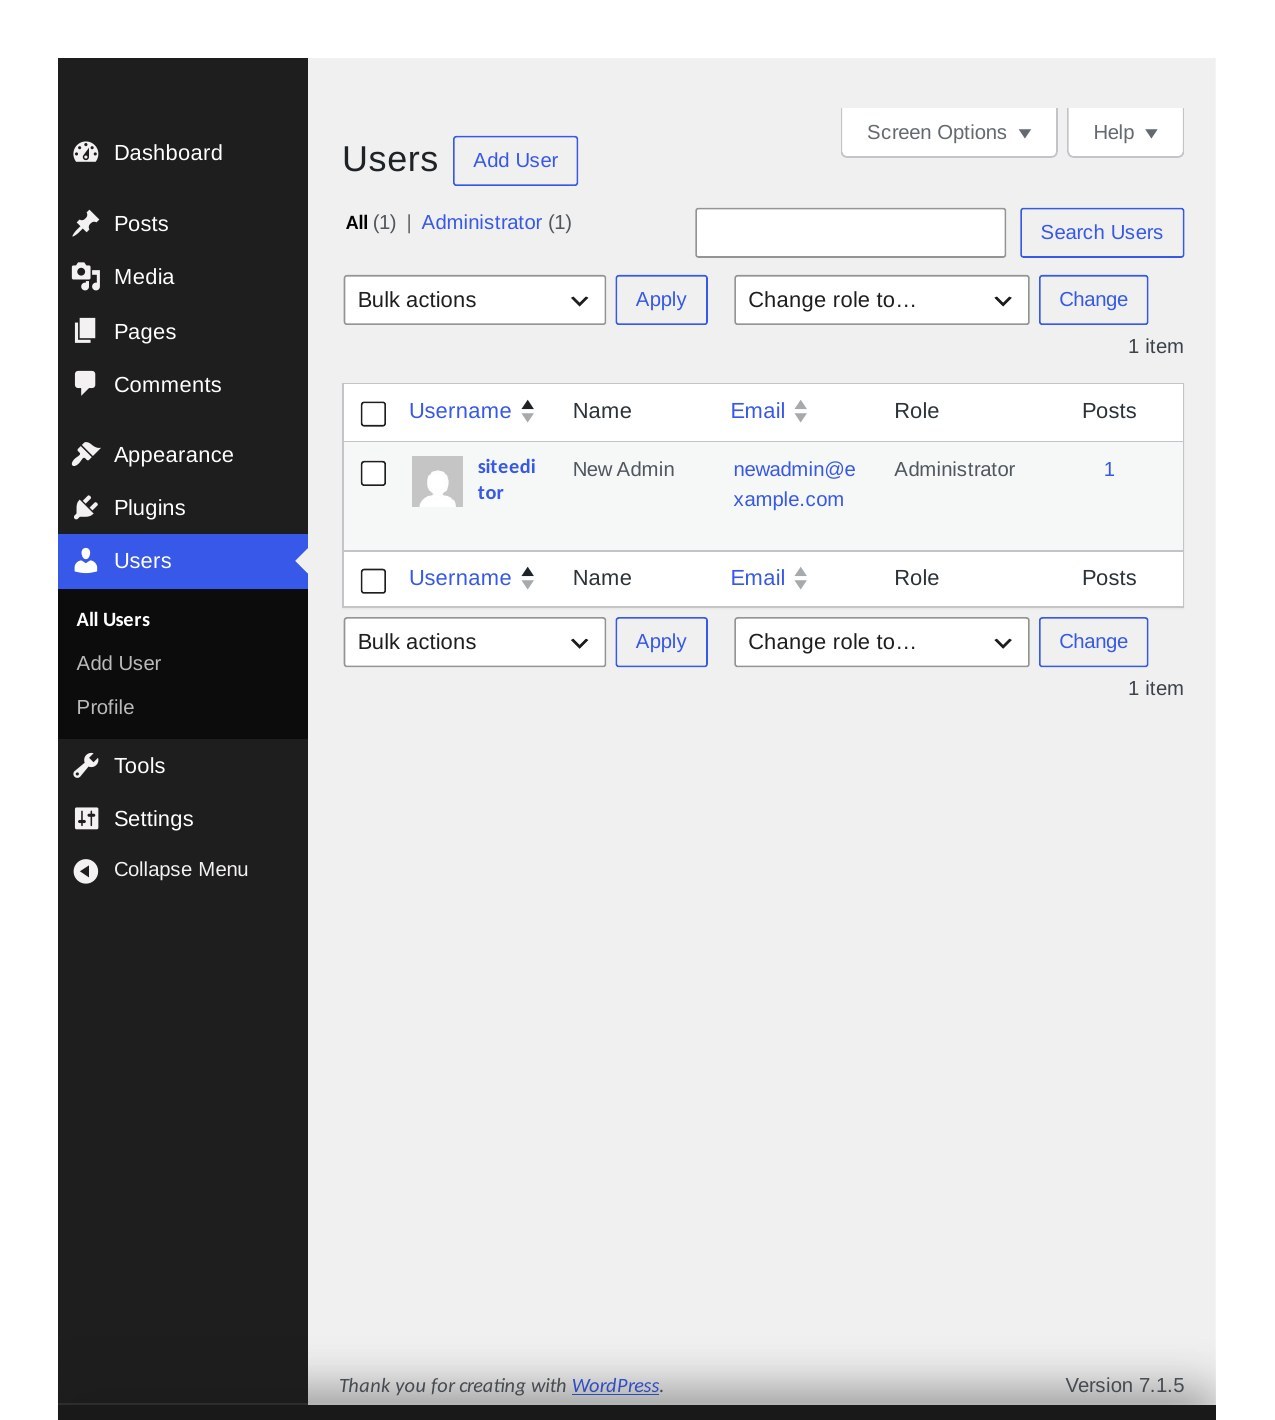
Method 2 gave the same result by a different route: one user left, the old posts attributed to it, and the front end showing the new author’s name.
What we could not verify
- Changing the username directly in the database. The usual third route is editing the user_login field in the database with phpMyAdmin. That needs a real hosting panel, so it was not tested on the test installs. It is also the riskiest route — a wrong edit can lock you out — so the two methods above are the ones to use.
- Renaming to a username that already exists. We did not test what the plugin does if the new username is already taken by another user. Pick a name that no other user on your site has.
- The plugin’s email options. Username Changer’s settings include options to send an email when a username changes. We did not test those, and they do not affect the rename itself.
Which method should you use?
- You want the login name changed, quickly, with nothing else moving: Method 1, the Username Changer plugin. It renames the user in place and keeps every post attached.
- You do not want another plugin, and you do not mind a new account: Method 2, the new-admin swap. Just remember to attribute the old user’s content to the new user, and never delete the old account before you have logged in as the new one.
- You only want a different name shown next to your posts: Method 3, change the display name. It does not change your login, and that is fine if the login name was never the problem.
The username field being read-only is WordPress protecting you from a rename that breaks things. Either of the two real methods gets around it safely — the plugin in two minutes, or the new-user swap with no plugin at all.

About the author
Learn WordPress Online is written by Mohd Shah Ahmad, a WordPress & WooCommerce specialist based in Pretoria, South Africa, who builds and runs live WooCommerce stores and designed the websites for Aaliyah Perfumes and Stanley’s Bakery. Every guide is tested step by step on a WordPress test install before it is published.